GloMax® Navigator System Instructions for Use of Products GM2000 and GM2010
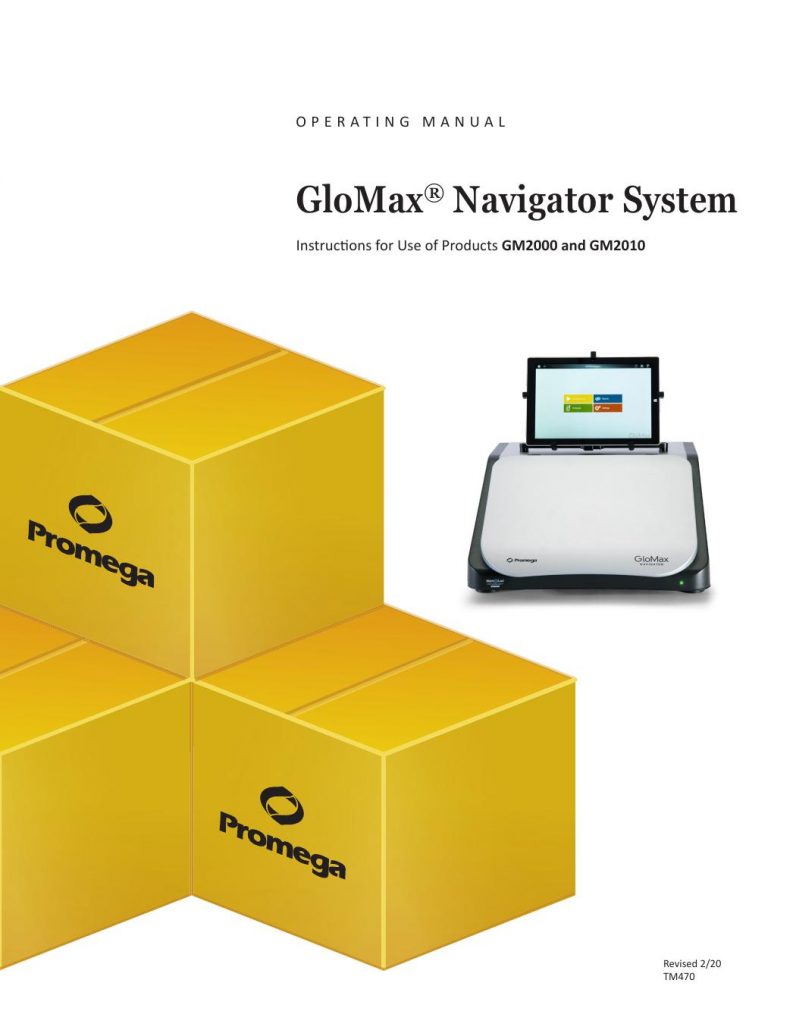
GloMax® Navigator System Instructions for Use of Products GM2000 and GM2010 OPERATING MANUAL Revised 2/20 TM470 Promega Corporation · 2800 Woods Hollow Road · Madison, WI 53711-5399 USA · Toll Free in USA 800-356-9526 · 608-274-4330 · Fax 608-277-2516 1 www.promega.com TM470 · Revised 2/20 All technical literature is available at: www.promega.com/protocols/ Visit the web site to verify that you are using the most current version of this Technical Manual. E-mail Promega Technical Services if you have questions on use of this system: techserv@promega.com GloMax® Navigator System 1. Introduction……………………………………………………………………………………………………………….. 2 1.A. Description …………………………………………………………………………………………………………. 2 1.B. Specifications ………………………………………………………………………………………………………. 3 1.C. Product Components …………………………………………………………………………………………….. 5 1.D. Precautions and Special Instructions…………………………………………………………………………. 6 1.E. Environmental Requirements ………………………………………………………………………………….. 8 1.F. Inspection and Unpacking………………………………………………………………………………………. 9 2. Setting Up the GloMax® Navigator System ……………………………………………………………………….. 10 2.A. Setting Up the GloMax® Navigator Instrument and Tablet PC………………………………………… 10 2.B. Switching On the GloMax® Navigator Instrument……………………………………………………….. 11 2.C. Shutting Down the GloMax® Navigator Instrument …………………………………………………….. 12 2.D. Operating the GloMax® Navigator System…………………………………………………………………. 12 3. GloMax® Navigator User Interface Screens ………………………………………………………………………. 14 3.A. Tablet PC ‘Home’ Screen ………………………………………………………………………………………. 14 3.B. Quick Read Screen………………………………………………………………………………………………. 15 3.C. Protocols Screen…………………………………………………………………………………………………. 16 3.D. Running a Protocol……………………………………………………………………………………………… 27 3.E. ‘Results, Templates and Analyses’ Screen………………………………………………………………….. 44 3.F. Analysis of Results ………………………………………………………………………………………………. 48 3.G. ‘Settings’ Screen …………………………………………………………………………………………………. 69 3.H. Administrator Settings…………………………………………………………………………………………. 72 4. Operating the Injector System (optional) …………………………………………………………………………. 83 4.A. Priming Injectors ……………………………………………………………………………………………….. 84 4.B. Reverse Purge (Retrieving Unused Reagents from Injectors, optional)…………………………….. 85 4.C. Flushing the Injectors after Use ……………………………………………………………………………… 85 5. Cleaning and Maintenance……………………………………………………………………………………………. 86 5.A. General Instrument Care………………………………………………………………………………………. 86 5.B. General Cleaning ………………………………………………………………………………………………… 86 5.C. Tablet PC Care …………………………………………………………………………………………………… 86 5.D. Cleaning the Optical Head…………………………………………………………………………………….. 87 5.E. Cleaning the Instrument Interior ……………………………………………………………………………. 89 5.F. Cleaning the Injectors ………………………………………………………………………………………….. 90 5.G. Cleaning the Waste Collection Tray …………………………………………………………………………. 90 5.H. Removing or Replacing Inlet and Outlet Tubing …………………………………………………………. 90 5.I. Additional Maintenance ……………………………………………………………………………………….. 91 2 Promega Corporation · 2800 Woods Hollow Road · Madison, WI 53711-5399 USA · Toll Free in USA 800-356-9526 · 608-274-4330 · Fax 608-277-2516 TM470 · Revised 2/20 www.promega.com 1. Introduction 1.A. Description The GloMax® Navigator System(a) is an easy-to-use microplate luminometer integrated with Promega chemistries for superior assay performance. This instrument provides researchers superior luminescence sensitivity and dynamic range for both strong and weak bioluminescence experimental samples as well as seamless integration with Promega industry-leading bioluminescence assays, including bioluminescent gene reporter, cell-based and biochemical assays. The luminometer features optional dual injectors to measure both glow- and flash-based luminescent reactions in 96-well plates. The instrument is operated by an integrated Tablet PC, which provides quick and easy navigation through the control options. Exporting your results is simple with a variety of options, including export to your local data network, USB flash drive and cloud-based storage location. The GloMax® Navigator software provides many of the required technical elements of a part 11-compliant system (user authentication and authorization, data integrity and protection, electronic signatures and audit trails) when used with the appropriate laboratory workflow. Figure 1. The GloMax® Navigator System. 6. Troubleshooting…………………………………………………………………………………………………………. 92 6.A. Error Messages ………………………………………………………………………………………………….. 92 6.B. Common Problems ……………………………………………………………………………………………… 93 6.C. Use of a USB Flash Drive ………………………………………………………………………………………. 96 7. Appendix………………………………………………………………………………………………………………….. 97 7.A. Configuring the Tablet PC……………………………………………………………………………………… 97 7.B. Icons and Symbols …………………………………………………………………………………………….. 106 7.C. Warranty and Service…………………………………………………………………………………………. 107 7.D. Certificate of Decontamination …………………………………………………………………………….. 108 7.E. Related Products ………………………………………………………………………………………………. 109 7.F. Summary of Changes………………………………………………………………………………………….. 111 Promega Corporation · 2800 Woods Hollow Road · Madison, WI 53711-5399 USA · Toll Free in USA 800-356-9526 · 608-274-4330 · Fax 608-277-2516 3 www.promega.com TM470 · Revised 2/20 1.B. Specifications Instrument Specifications Detection Modes Luminescence Read Type Glow, Flash, Kinetic, Repeat Sample Format 96-well plates Tablet PC Windows® 8.1 or 10 Tablet PC with USB connection to instrument, wireless connectivity to local network; export to network, cloud or USB flash drive Dimensions 18.6in (47.2cm) width 20.0in (50.8cm) depth 9.4in (23.9cm) height without Tablet PC mounted 18in (45.7cm) height with Tablet PC mounted Weight Approximately 40lb (18.1kg) Power Requirements 0.5A @ 100–240V AC, 50/60Hz (universal) Warranty 1-year parts and labor warranty included Regulatory Compliance For Research Use Only. Not for use in Diagnostic Procedures. CE Compliance Pollution degree 2 Installation category II Indoor use only Mains supply voltage fluctuations are not to exceed ±10 percent of the nominal supply voltage This instrument complies with the requirements of the EU Directives for electromagnetic compatibility (EMC Directive) and electrical safety (the LVD). Compliance with the relevant Directives was demonstrated by third-party testing to the appropriate EN and IEC standards. The product bears the CE mark on its label as evidence of compliance, and an EU Declaration of Conformity for the product is available from Promega on request. Luminescence Module Specifications Detector Top-reading, head-on photon-counting photomultiplier tube (PMT) Wavelength Range 350–700nm Detection Limit 1.5 × 10⁻²¹ moles of luciferase Dynamic Range >9 logs Cross Talk Less than 3 × 10⁻⁵ (white, 96-well plate, Corning Cat.# 3912) 4 Promega Corporation · 2800 Woods Hollow Road · Madison, WI 53711-5399 USA · Toll Free in USA 800-356-9526 · 608-274-4330 · Fax 608-277-2516 TM470 · Revised 2/20 www.promega.com 1.B. Specifications (continued) Injector System Specifications Number of Injectors (optional) Two injectors Dispense Volume Range 5–200µl in 1µl increments Injection Speed 20–500µl per second Waste Collection Tray Volume Approximately 50ml Void Volume 500µl Computer Requirements Operating System Windows® 8.1 or 10 Pro, 64 bit, with USB connection to instrument RAM 2GB (4GB preferred) Disk Space 64GB Other Requirements Microsoft.NET Framework 4.6.2, MicrosoftExcel® 2013 Professional Additional Computer Recommendations if Using Your Own PC: • Disable automatic Windows® updates and virus scans • Disable automatic power off, sleep or hibernation settings Disable “Fast Startup”. Set the power button to Shut Down, not Sleep. Disable any other automatically or manually started software that would consume PC resources during operation. • Ensure there are no domain policies that would overwrite any of the above settings. • Ensure that Windows® will not turn off USB ports to save power. Note: The Tablet PC provided with GloMax® Navigator is already configured for the settings listed above. Promega Corporation · 2800 Woods Hollow Road · Madison, WI 53711-5399 USA · Toll Free in USA 800-356-9526 · 608-274-4330 · Fax 608-277-2516 5 www.promega.com TM470 · Revised 2/20 1.C. Product Components PRODUCT SIZE CAT.# GloMax® Navigator System 1 each GM2000 For Research Use. Not for use in Diagnostic Procedures. Includes: • 1 each GloMax® Navigator Instrument • 1 each Tablet PC containing GloMax® Navigator Software • 1 each Tablet PC AC Power Adapter • 1 each Tablet Mount Attachment • 1 each AC Power Adapter with detachable power cord • 1 each USB Cable • 1 each 2.5mm Wrench PRODUCT SIZE CAT.# GloMax® Navigator System with Dual Injectors 1 each GM2010 For Research Use. Not for use in Diagnostic Procedures. Includes: • 1 each GloMax® Navigator Instrument • 1 each Tablet PC containing GloMax® Navigator Software • 1 each Tablet PC AC Power Adapter • 1 each Tablet Mount Attachment • 1 each AC Power Adapter with detachable power cord • 1 each USB Cable • 1 each 2.5mm Wrench • 1 each Dual Injectors (installed) • 1 each Reagent Bottle Holder • 1 each Waste Collection Tray Available Separately PRODUCT SIZE CAT.# Dual Injectors and Pump Station Upgrade for GloMax® Navigator 1 each SA1304 GloMax® Luminometer Light Plate 1 each E6531 6 Promega Corporation · 2800 Woods Hollow Road · Madison, WI 53711-5399 USA · Toll Free in USA 800-356-9526 · 608-274-4330 · Fax 608-277-2516 TM470 · Revised 2/20 www.promega.com 1.D. Precautions and Special Instructions Safety Symbols and Special Markings 5294MA.eps Danger. Hazardous voltage. Risk of electrical shock. Danger. Tension dangereuse. Risque de choc électrique. 5295MA.eps Warning. Risk of personal injury to the operator or a safety hazard to the equipment or surrounding area. Avertissement. Risque de préjudice corporel pour l’opérateur ou d’accident avec l’instrument ou l’entourage. 6687TA.eps It is important to understand and follow all laws regarding the safe and proper disposal of electrical instrumentation. Please contact your local Promega Representative for disposal of the instrument and power supply. Please follow your institutional requirements for disposal of the accessories. Avertissement. Il est important de comprendre et de respecter toutes les lois relatives à la destruction sure et correcte des appareils électriques. Veuillez contacter votre représentant Promega local concernant la destruction de l’appareil.Veuillez respecter les exigences de votre établissement concernant la destruction des accessoires. 13631TA Clean up spills. Nettoyer les déversements. Promega Corporation · 2800 Woods Hollow Road · Madison, WI 53711-5399 USA · Toll Free in USA 800-356-9526 · 608-274-4330 · Fax 608-277-2516 7 www.promega.com TM470 · Revised 2/20 Special Instructions • Wipe up spills immediately. • The GloMax® Navigator Instrument contains sensitive optical components and precision-aligned mechanical assemblies. Handle with care. • Use caution around solvents because they may damage the plastic case of the GloMax® Navigator Instrument. • Do not submerge the GloMax® Navigator Instrument in water. • Do not expose the GloMax® Navigator Instrument to temperatures outside the specified range, as damage may occur to the unit that will not be covered under warranty. • Changes or modifications to this unit not expressly approved by Promega could void the user’s authority to operate the equipment. • Do not use this device in proximity to sources of strong electromagnetic radiation (e.g., microwave oven) because they may interfere with the proper operation. • Do not use this instrument for anything other than its intended use. • Always disconnect the power before cleaning or performing routine maintenance. • Do not disassemble the instrument further than specified in this operating manual for routine maintenance and use. • If the equipment is used in a manner other than that specified by Promega, the protection provided by the equipment may be impaired. • Do not overfill multiwell plate wells because this may lead to spills and/or damage. • If injectors are installed, check the tubing periodically and replace as needed to avoid leaks. • Plug instrument and Tablet PC into the same wall socket or outlet strip to assure common grounding. • Do not leave plate in the instrument after protocol is completed. 8 Promega Corporation · 2800 Woods Hollow Road · Madison, WI 53711-5399 USA · Toll Free in USA 800-356-9526 · 608-274-4330 · Fax 608-277-2516 TM470 · Revised 2/20 www.promega.com 1.D. Precautions and Special Instructions (continued) Precautions Important Safety Instructions—Please save these instructions. 5294MA.eps Power OFF the GloMax® Navigator before accessing the interior, installing or cleaning injectors. Mise hors tension de GloMax® Navigator avant d’accéder à l’intérieur, l’installation ou le nettoyage des injecteurs. 5295MA.eps Close the instrument door when the GloMax® Navigator is not in use. Fermez la porte de l’appareil lorsque le GloMax® Navigator n’est pas en cours d’utilisation. 5295MA.eps The GloMax® Navigator is intended for indoor use only. Le GloMax® Navigator est destiné à une utilisation en intérieur. 5295MA.eps Always disconnect the power before cleaning or performing routine maintenance. Déconnectez toujours l’alimentation avant de nettoyer ou d’effectuer l’entretien de routine. 5295MA.eps Always disconnect the AC Adaptor from the power outlet when not in use. Toujours débrancher l’adaptateur secteur de la prise de courant lorsqu’il n’est pas utilisé. 1.E. Environmental Requirements Store and use the GloMax® Navigator under the following conditions: Shipping and Storage Conditions 4–50°C, under noncondensing conditions, up to 75% humidity Operating Conditions 5–30°C, up to 75% humidity Operating Altitude Conditions less than 2,000 meters above sea level Promega Corporation · 2800 Woods Hollow Road · Madison, WI 53711-5399 USA · Toll Free in USA 800-356-9526 · 608-274-4330 · Fax 608-277-2516 9 www.promega.com TM470 · Revised 2/20 1.F. Inspection and Unpacking Upon receiving the GloMax® Navigator System, inspect it carefully and make certain all accessories are included. Refer to the checklist shipped with the instrument for order-specific items. Save all packaging materials, if possible, in case the instrument needs to be returned for service. If any item is damaged, contact Promega Technical Services (e-mail: techserv@promega.com). Standard components are shown in Figure 2, Panel A. Figure 2. GloMax® Navigator System Accessory Components. Panel A. Components shown include: Tablet PC, Tablet PC Stylus, Tablet Fitting for mounting the Tablet PC, Tablet PC AC Power Adapter, Instrument Power Cord, Instrument AC Power Adapter, USB Cable and 2.5mm Wrench. Panel B. Reagent Bottle Holder (for GM2010 model only). Panel C. Waste Collection Tray (for GM2010 model only). 1. Remove the instrument and accessory box from the shipping container. 11852TA Figure 3. Contents of the GloMax® Navigator System accessory box. A. B. 13595TA C. 10 Promega Corporation · 2800 Woods Hollow Road · Madison, WI 53711-5399 USA · Toll Free in USA 800-356-9526 · 608-274-4330 · Fax 608-277-2516 TM470 · Revised 2/20 www.promega.com 1.F. Inspection and Unpacking (continued) 2. Place the GloMax® Navigator Instrument on a flat, level surface. 3. Ensure that the instrument is placed in a location that will allow you to meet the power requirement specifications (100–240V AC, 50/60Hz; Section 1.B). 4. Manually open the door of the instrument, and remove the interior foam packaging that prevents the optical head from moving during shipment. 2. Setting Up the GloMax® Navigator System 2.A. Setting Up the GloMax® Navigator Instrument and Tablet PC 1. Unpack the Tablet PC from its shipping box. 2. Place the Tablet PC in the Tablet Holder on the top of the GloMax® Navigator Instrument in the orientation shown in Figure 4. Fi 13516TA gure 4. Instrument front and Tablet PC holder setup. 3. Secure the Tablet PC in the Tablet Holder by using the 2.5mm Wrench to screw the Tablet Mount Attachment Piece into place. 4. Ensure that the instrument On/Off switch is in the OFF position (Figure 5). 5. Using the provided USB cable, connect the Tablet PC to the USB port on the back of the instrument (Figure 5). 6. Connect the Tablet PC to its power supply, and then connect the Tablet PC Power Cable to a power outlet. 7. Connect the Instrument AC Power Adapter to the back of the instrument and to a power outlet. Note: We recommend connecting the instrument to an uninterrupted power supply (~500VA). Promega Corporation · 2800 Woods Hollow Road · Madison, WI 53711-5399 USA · Toll Free in USA 800-356-9526 · 608-274-4330 · Fax 608-277-2516 11 www.promega.com TM470 · Revised 2/20 F 13542TB Instrument lid Outlet tubing Optical head Microplate sample tray and cover Sample tray latch Injector tip holder Injector syringe Inlet tubing Reagent bottle holder location Tubing guide LED status light igure 5. Interior view of the GloMax® Navigator Instrument 13517TB A B C D Figure 6. The back of the GloMax® Navigator Instrument. A. On/Off switch. B. Power connection. C. USB port to connect to Tablet PC. D. Two USB ports to attach an external USB flash drive, USB hub or Bar Code Reader.. 2.B. Switching On the GloMax® Navigator Instrument 1. Switch the instrument ON. 2. An LED light on the front right corner of the GloMax® Navigator indicates when the instrument is ON. 3. Power up the Tablet PC by pressing and holding the power button on the perimeter of the Tablet PC. Note: When powering ON, turn the instrument ON first and then the Tablet. A connectivity message may appear in the software if the Tablet is powered ON before the instrument. If that occurs power OFF the Tablet and then power ON the Tablet. 12 Promega Corporation · 2800 Woods Hollow Road · Madison, WI 53711-5399 USA · Toll Free in USA 800-356-9526 · 608-274-4330 · Fax 608-277-2516 TM470 · Revised 2/20 www.promega.com 2.B. Switching On the GloMax® Navigator Instrument (continued) 4. The Tablet PC will begin its start-up protocol. After the operating software starts, either tap on the GloMax® Navigator Software Icon or double tap the GloMax® Navigator Software Icon on the Desktop screen to launch the GloMax® Navigator software. 5. The GloMax® Navigator System is now ready to use. F 16619TA Exit Back Portal Tools Door Help igure 7. GloMax® Navigator software ‘Home’ screen. 2.C. Shutting Down the GloMax® Navigator Instrument 1. Switch the instrument OFF using the On/Off switch on the back of the instrument. 2. Shut down the GloMax® Navigator Software by tapping on the x in the upper left corner (Figure 7). 3. Shut down the Tablet PC using the Windows® shutdown procedure appropriate for your tablet PC: Windows 8: Swipe in from the right edge of the screen, select Settings, then select Power: Shut Down. Windows 10: From the Desktop screen, swipe upward to expose the Taskbar. Touch the Start button to open the Start menu, then touch the Power icon on the left side of the Start menu. From the Power dropdown list, touch the Shut Down item. Note: When not in use for a prolonged period of time, the Tablet PC should be powered OFF. 2.D. Operating the GloMax® Navigator System 1. Open the door of the instrument and gently press the Microplate Sample Tray latch to release the tray cover (Figure 5). If a lid is present, remove from plate. Insert an opaque 96-well plate such that well A1 of the plate corresponds to the label “A1” on the plate tray (Figure 8). ! Promega Corporation · 2800 Woods Hollow Road · Madison, WI 53711-5399 USA · Toll Free in USA 800-356-9526 · 608-274-4330 · Fax 608-277-2516 13 www.promega.com TM470 · Revised 2/20 2. Close the sample tray cover and the instrument door. Figure 8. Inserting plate into sample tray. 3. Select the Luminescence Quick Read protocol on the ‘Home’ screen, or access a protocol of interest by pressing the Protocols button. 4. Select the Start button at the bottom right corner of the screen. 5. Enter the name of the result file by touching inside the text box and entering a name (Figure 9). 13596TA Figure 9. Save Results Window. 6. Select Start to begin the protocol. 7. The protocol will begin acquiring data and will display the results in the plate format in real time on the screen. 8. When the read is finished, Export and Analysis buttons will be active on the bottom left corner of the screen. Press Export to export results to the folder location specified by the administrator (Section 3.H, Administrator Settings). Results can be viewed and exported at a later time by touching the Results button on the ‘Home’ screen. Press the Analysis button to analyze results generated from the protocol (see Section 3.F, Analysis of Results). 14 Promega Corporation · 2800 Woods Hollow Road · Madison, WI 53711-5399 USA · Toll Free in USA 800-356-9526 · 608-274-4330 · Fax 608-277-2516 TM470 · Revised 2/20 www.promega.com 3. GloMax® Navigator User Interface Screens 3.A. Tablet PC ‘Home’ Screen The ‘Home’ screen on the Tablet PC is the main launching pad for interaction with the functionalities built into the GloMax® Navigator Graphical User Interface Software. The ‘Home’ screen (Figure 10) contains 4 buttons: Luminescence. This Quick Read button allows you to immediately perform a luminescence read, selecting the plate map and Integration time. Protocols. Pressing the Protocols button will provide you a list of all available protocols. These include preloaded protocols as well as user-defined protocols. The user can create user-defined protocols from this screen as well. Smart Protocols provide analysis directly after the measurement is completed. Results. Use the Results button to access results, data analysis templates and data analyses. List items can be filtered by start and end date, or a keyword search can be used to find results based on Name, User or any other associated information. Settings. Pressing the Settings button provides the user with instrument information and setup options. For example, one can name the instrument, specify where files are exported on the PC or Network drive, export log files, and access additional Tools. 16619TA Exit Back Portal Tools Door Help Figure 10. GloMax® Navigator ‘Home’ screen. Promega Corporation · 2800 Woods Hollow Road · Madison, WI 53711-5399 USA · Toll Free in USA 800-356-9526 · 608-274-4330 · Fax 608-277-2516 15 www.promega.com TM470 · Revised 2/20 The Instrument name appears in the title bar of the user interface. The following navigation buttons are displayed across the top of the user interface window: Exit. Tapping this button allows you to exit the GloMax® Navigator User Interface software and returns to the Windows® Operating System. Back. Tapping this button returns you to the previous window. Portal. This icon indicates that the GloMax® Software is connected to Portal software. Tools. Tapping this button expands a list of available tools such as accessing the Injectors to Prime, Reverse Purge and/or Flush and viewing the instrument information (About). Eject. Tapping this button will move the Plate Tray to the Home position to add or remove a plate from the instrument. Help. Tapping the Help button (question mark icon) activates the context-sensitive help for the current page of the GloMax® Navigator User Interface. 3.B. Quick Read Screen Quick Reads are intended to allow users to perform a basic single-step measurement very easily. Simply define the plate map and the integration time for luminescence. Open the door, insert your plate, and press the Start button in the lower right corner to begin the plate read. 13597TA Select Integration time. Start measurement. Define the Plate Map. Blue = selected, Gray = unselected Figure 11. GloMax® Navigator ‘Luminescence Quick Read’ screen. On the plate map, blue wells are selected. 16 Promega Corporation · 2800 Woods Hollow Road · Madison, WI 53711-5399 USA · Toll Free in USA 800-356-9526 · 608-274-4330 · Fax 608-277-2516 TM470 · Revised 2/20 www.promega.com 3.C. Protocols Screen Touch Protocols from the ‘Home’ screen to access the list of protocols currently present in the software or create a new protocol. Select Favorites. Create new protocol. View protocols of interest. 16620T A Figure 12. GloMax® Navigator ‘Protocol’ screen. Protocols are displayed in a table format with several columns of information. Touch any of the column titles at the top of the screen to sort the list of protocols in increasing or decreasing order by that column’s contents. Column Description 11615TA Protocols can be marked as favorites by touching the star on the left side of the protocol entry. Favorite protocols are automatically shown at the top of the protocols list the next time you access the ‘Protocols’ screen. Name The Name column displays the name of the protocol. Date/Time The date and time that the protocol was created is shown in the Date/Time column. User The username of the individual who created the protocol. Info Additional identifying information entered by a user for this protocol. Protocol selection checkbox. When performing actions (e.g. Info…, Remove, Export), use the checkbox to select the methods to which the action will apply. The checkbox shown in the table header can be used to toggle all of the checkboxes on or off for displayed methods. Promega Corporation · 2800 Woods Hollow Road · Madison, WI 53711-5399 USA · Toll Free in USA 800-356-9526 · 608-274-4330 · Fax 608-277-2516 17 www.promega.com TM470 · Revised 2/20 Filtering the List of Protocols Use the buttons at the top left side of the screen to filter the list of protocols and display only User-created protocols, Preset protocols, Smart protocols or All protocols. Only protocols that correspond to the selected filter button will be displayed. Further refinement of the displayed protocols is available using the Search button. After pressing the Search button, an on-screen keyboard is displayed to enter a keyword. This keyword is searched within the Name, User and Info fields. All protocols which contain the keyword in any field are displayed. To remove the keyword, press the Search button again, press the Backspace button on the on-screen keyboard, and then press the Enter button. Adding Searchable Information to Protocols Select one or more protocols to which information should be added using the checkboxes to the right of each protocol entry. When one or more protocols are selected, the Info… button becomes active. Press the Info… button on the bottom left side of the screen to open the ‘Info’ screen (Figure 13). Touch the User Info text box to display an on-screen keyboard. Enter any text you want associated with the selected protocol(s) and press OK or Enter on the on-screen keyboard. Press the OK button on the ‘Info’ screen to associate this text with the protocol(s) or press the Cancel button to discard any changes. If text is already present in the Info column for a protocol, adding different text using the ‘Info’ screen will replace the previous text for that protocol. 16555TA Figure 13. ‘Info’ screen. After selecting a protocol(s) and pressing the Info… button, the ‘Info’ screen is displayed. Touch the User Info text box to show an on-screen keyboard. Enter any identifying text to associate with the selected protocol(s), then press OK or Enter on the keyboard. Press the OK button on the ‘Info’ screen to associate this text with the selected protocol(s) or press the Cancel button to discard any changes. 18 Promega Corporation · 2800 Woods Hollow Road · Madison, WI 53711-5399 USA · Toll Free in USA 800-356-9526 · 608-274-4330 · Fax 608-277-2516 TM470 · Revised 2/20 www.promega.com Removing Protocols Removing protocols from the GloMax® Software has several restrictions: • Only user-defined protocols may be removed. • Administrators are allowed to remove protocols • Based on software preferences, users may be allowed to remove protocols (See Section 3.H) Select one or more protocols to be removed from the software using the checkboxes to the right of each protocol entry. When one or more user-defined protocols is selected, the Remove button becomes active. Note: If a combination of user-defined, preset or smart protocols is selected, the Remove button will not become active. Only user-defined protocols may be removed from the software. Press the Remove button to remove all selected protocols from the software. You will be asked to confirm the request to delete protocols (Figure 14). F 11628TA igure 14. Delete Protocol message from the GloMax® Discover software. Exporting Protocols It is possible to export user-defined protocols from one installation of the GloMax® Software for import into a separate installation of the GloMax® Software. Exporting protocols has two restrictions: • Only user-defined protocols may be exported • Only administrators have permission to export protocols Note: If the operator only has user permissions in the GloMax® Software, the Export button will not be displayed on the ‘Protocols’ screen. Select one or more protocols to be exported from the software using the checkboxes to the right of each protocol entry. When one or more user-defined protocols is selected, the Export button becomes active. Note: If a combination of user-defined, preset or smart protocols is selected, the Export button will not become active. Only user-defined protocols may be exported from the software. Promega Corporation · 2800 Woods Hollow Road · Madison, WI 53711-5399 USA · Toll Free in USA 800-356-9526 · 608-274-4330 · Fax 608-277-2516 19 www.promega.com TM470 · Revised 2/20 Press the Export button to export all selected protocols from the software. A ‘Select Folder’ file browser is displayed (Figure 15). Using the yellow and red rectangle buttons, you can select the folder location where the exported protocol(s) will be saved. The current path is indicated by the yellow rectangles at the top of the ‘Export Folder’ screen. Any folders present within the selected directory are displayed as red rectangles in the main portion of the screen. Touch the Drive\ button to navigate to the drive location of the desired folder. Touch the red folder buttons to navigate to the desired folder location. Once a path has been defined, touch the OK button to export the protocol(s) to the specified path, or touch Cancel to return to the ‘Protocols’ screen without exporting. 16621TA Figure 15. ‘Select Folder’ screen. When exporting a user-defined protocol(s), select a folder location to which the exported protocols should be saved. Only user-defined protocols may be deleted. To delete protocols, select one or more checkboxes to the right of the protocol and then press the Remove button. The user will be asked to confirm the request to delete protocols. 20 Promega Corporation · 2800 Woods Hollow Road · Madison, WI 53711-5399 USA · Toll Free in USA 800-356-9526 · 608-274-4330 · Fax 608-277-2516 TM470 · Revised 2/20 www.promega.com Viewing Existing Protocols 1. To view details of an existing protocol, from the ‘Protocols’ screen, select the protocol of interest. 2. The protocol details will appear. If any changes are made to the protocol, the user has the ability to Save or Save As and provide a new name. 3. To run the protocol, press the Start button in the lower right corner of the screen. 13598TA Plate map for global settings. Expand protocol steps for more detail. Save as, Save and Start protocol. Protocol name and estimated duration. Figure 16. GloMax® Navigator ‘Protocol’ screen. Creating a New Protocol Basic Protocol Steps 1. To create a new protocol, from the ‘Protocols’ screen, tap the New Protocol button at the bottom of the screen (Figure 12). To edit an existing protocol, select a preset or user-defined protocol from the ‘Protocols’ screen (Home Protocols). 2. You will be prompted to name the protocol. You also may provide a description, if desired (Figure 17). 11630TA Figure 17. New Protocol name prompt from the GloMax® Navigator software. Promega Corporation · 2800 Woods Hollow Road · Madison, WI 53711-5399 USA · Toll Free in USA 800-356-9526 · 608-274-4330 · Fax 608-277-2516 21 www.promega.com TM470 · Revised 2/20 3. Build your protocol by dragging and dropping protocol functions from the left panel onto the Protocol Window (Figures 18 and 19). Individual protocol functions are described in the Protocol Functions section below. Use the Properties button on the right to modify the name and description of the protocol. F 13601TA Drag and drop protocol steps into white area. igure 18. GloMax® Navigator ‘New Protocol’ screen showing drag and drop feature to create custom protocols. Figure 13602TA 19. GloMax® Navigator ‘New Protocol’ screen showing a step added to the protocol. 4. Select integration times and plate map (see below) as you build the protocol. 5. Rearrange steps by dragging and dropping as desired. 6. Delete steps by selecting the black X in the top right corner of the step. 7. Save the protocol by selecting either the Save or Save As button on the bottom right corner of the screen. If requested, enter any protocol name and description information and press the OK button. A user message will appear indicating that the protocol was saved successfully (Figure 20). 8. To run the protocol, press the Start button in the lower right corner of the screen. 22 Promega Corporation · 2800 Woods Hollow Road · Madison, WI 53711-5399 USA · Toll Free in USA 800-356-9526 · 608-274-4330 · Fax 608-277-2516 TM470 · Revised 2/20 www.promega.com F 11633TA igure 20. GloMax® Navigator New Protocol Successfully Saved user message. Plate Maps Note: If the plate map editor is locked, consult with your site administrator to see whether the option to prevent users from modifying plate maps has been enabled on your system. There are two ways to select a plate map for the measurement. The default is to apply the plate map to all steps within a protocol. In the upper right corner of the protocol, the user can lock or unlock the plate map (Figure 21). When locked (which is the default), the plate map is applied to each step of the protocol. When the plate map is applied to each step of the protocol, only the plate map in the upper right corner may be modified. The plate maps within each step of the protocol are then shaded and cannot be modified. 13604TA Plate Map is locked. Select Plate Map. Select Plate Map for each protocol step. Figure 21. When the plate map is locked, the map is applied to each step of the protocol. When the plate map is unlocked, each step of the protocol can have a different plate map (Figure 22). The plate map in the upper right corner in this case is shaded and cannot be modified, whereas the plate maps within each step of the protocol are now active and the user can modify each step as desired. Figure 13605TA Plate Map is unlocked and cannot be Select Plate Map applied. for each protocol step. 22. When the plate map is unlocked, a different plate map can be created for each step. Whenever a protocol is locked, the plate map that is indicated in the upper right corner will apply to each protocol step. Notice in Figure 22, step 1 of the protocol has columns 1–6 selected, and step 2 has columns 7–12 selected. When locking the protocol, each step will revert to the global plate map or to the new selected plate map. It is possible to import a plate map file to define a global plate map for a protocol. Follow the steps for Importing a Plate Map in Section 3.E. Promega Corporation · 2800 Woods Hollow Road · Madison, WI 53711-5399 USA · Toll Free in USA 800-356-9526 · 608-274-4330 · Fax 608-277-2516 23 www.promega.com TM470 · Revised 2/20 Luminescence Integration Times Integration times for luminescence reads may be selected from 0.1 to 10 seconds. Protocol Steps A variety of protocol steps can be used to customize your protocol of interest. These functions are added by dragging the button function in the left column of the ‘New Protocol’ screen into the protocol. The functions can be expanded and contracted by selecting the black triangle at the top left corner of each function. They may be removed by selecting the black X at the top right corner of each function. 13606TA Figure 23. GloMax® Navigator New Protocol Functions. Wait Function Use the Wait function to pause or incubate before taking a measurement. After selecting the duration time window, a keypad will appear in which you can enter the time in hh:mm:ss format. Enter between 1 second and 72 hours in increments of 1 second. F 13607TA 11640TA igure 24. Wait function screens. 24 Promega Corporation · 2800 Woods Hollow Road · Madison, WI 53711-5399 USA · Toll Free in USA 800-356-9526 · 608-274-4330 · Fax 608-277-2516 TM470 · Revised 2/20 www.promega.com Inject Function Dual Injectors are an optional accessory for the GloMax® Navigator Instrument. On instruments equipped with dual injectors, you can choose which injector to use (Injector 1, Injector 2 or both), the desired injection volume (5µl–200µl) and the injection speed (20µl/sec to 500µl/sec). Select the wells that will be injected by touching the plate map and selecting the desired wells. Warning: Make sure sufficient space is available in the well to accept the injected volume. Failure to do so may cause an overflow of reagent and/or sample into adjacent wells or into the interior of the instrument. See Cleaning and Maintenance (Section 5) if reagent is spilled inside the instrument. The injectors may also be accessed from the Tool icon in the menu bar. See Setting Up and Operating the Injector System (Section 4) for more details. 13608TA Figure 25. Inject Function.Prompt Use a message Prompt to provide the user with instructions. Tap Enter Message in the prompt, and a keyboard will appear for the user. Type a user message, then tap OK to enter it into the protocol. Figure 13610TA 26. Prompt Function. When the Eject Plate Prompt box is checked, the ‘Prompt’ screen shown in Figure 27 appears to the user during protocol, with the option to open the door. If Eject Plate is selected, the instrument will home and the user can then open the door and remove the plate. After returning the plate into the Plate Tray and closing the door, the user may then select Continue. When Continue is selected, the protocol continues to the next step. These prompts and commands are useful if performing a multi-step protocol where the user must add reagent to the samples between measurements prior to continuing the protocol. ! Promega Corporation · 2800 Woods Hollow Road · Madison, WI 53711-5399 USA · Toll Free in USA 800-356-9526 · 608-274-4330 · Fax 608-277-2516 25 www.promega.com TM470 · Revised 2/20 13609TA Figure 27. ‘Prompt’ screen with the Eject Plate option. Loop Loops are used to perform a set of steps on a per-plate basis over a fixed time interval, then repeating the set of steps a desired number of times. Note: The interval (min) field defines the minimal interval of time for one loop iteration. If all of the operations within the loop are completed before the specified interval time has passed, the software will wait for the specified interval. If all of the operations take longer than the specified interval time, the software will continue to the next iteration without waiting. Note: Loops can be used with luminescence detection and protocol functions. A maximum of 100 loops can be performed within a single loop step. 1. Add the Loop step to the protocol by dragging and dropping the Loop icon into the protocol. F 13611TA igure 28. Loop function. 2. Select the desired number of iterations. 3. If the same plate map will be used for each step of the protocol, lock the plate map in the upper right corner to select the wells. If a different plate map is to be used for various steps, unlock the plate map in the upper right corner, then select the plate map icon within each step of the loop to select the desired wells. 4. Begin building the desired workflow by dragging and dropping the desired steps inside the Loop step. They should be contained in the Loop step. Note: If adding an injector step inside a loop function, ensure that there is sufficient space in the well to accommodate multiple additions of reagent. 5. Rearrange the steps by touching and dragging the appropriate steps. ! 26 Promega Corporation · 2800 Woods Hollow Road · Madison, WI 53711-5399 USA · Toll Free in USA 800-356-9526 · 608-274-4330 · Fax 608-277-2516 TM470 · Revised 2/20 www.promega.com 13612TA Figure 29. Loop function with with a Luminescence step within the Loop container. Kinetics Function The Kinetics function is used to perform a set of steps on a per-well basis, then repeating the set of steps a desired number of times (i.e., inject and read one well multiple times before proceeding to the next well). Note: Kinetics can be used with all protocol functions except for user prompt functions. Loops may not be placed within a kinetic step, but kinetic steps may be placed within Loops. A maximum of 250 kinetic reads in 1-unit increments can be performed within a single kinetic step. For example, 10 readings with a 1-second interval means that 1 reading is taken every 1 second for 10 seconds. 1. Add the Kinetics step to the protocol by dragging and dropping the Kinetics icon onto the protocol. 13613TA Figure 30. Kinetics function. 2. All well-associated operations within the kinetic block must have the same well selection. The plate maps of these operations are not individually editable. 3. Begin building the desired workflow by dragging and dropping the desired steps into the kinetic step. They should be contained within the kinetic step. F 13614TA igure 31. Kinetic Function with a Luminescence step within the Kinetic container. Promega Corporation · 2800 Woods Hollow Road · Madison, WI 53711-5399 USA · Toll Free in USA 800-356-9526 · 608-274-4330 · Fax 608-277-2516 27 www.promega.com TM470 · Revised 2/20 4. Select the number of readings and interval (seconds) between each reading. Note: Typically the protocol steps are completed before the completion of the interval time, and therefore the instrument will pause until the completion of the interval time duration. However, if the protocol steps take longer to complete than the interval time, the protocol will complete all steps and then immediately continue without pausing for the interval time duration. Otherwise, once all steps are completed the protocol will pause until the interval time duration has been reached. 5. Rearrange the steps by touching and dragging the step. 3.D. Running a Protocol Three general types of protocols are available within the GloMax® Software: Smart Protocols, Preset Protocols and User-Defined Protocols. When running a protocol, the results will display in real-time as the protocol proceeds. Results are automatically saved within the GloMax® Software. However, they can also be exported to a variety of locations, including the local Tablet PC, to a USB flash drive, a network drive or to a cloud location. Upon completion of the protocol, results can be analyzed using the Analysis functions in the GloMax® Software as described in Section 3.F, Analysis of Results. Smart Protocols Smart Protocols are designed to provide the user with a guided setup of specific assays. Smart Protocols titled “Demo” should not be run for any other purpose than a demonstration of an assay kit. Following the data collection, the results are automatically analyzed for the user. 1. Tap the Smart button and select the protocol of interest. 2. Follow the on-screen instructions. Insert the plate into the instrument. 3. Tap OK when ready to begin the protocol. The protocol will begin when OK is selected, so ensure the plate has been loaded into the instrument. 4. When the read is complete, the Export button will appear in the lower left corner of the screen. Upon selecting Export, the raw data will be exported to the location specified by the user. The Analysis button also appears to the right of the Export button. Selecting Analysis will analyze the results as described in Section 3.F, Analysis of Results. Preset and User-Defined Protocols Preset protocols are provided by Promega with settings specific to Promega cell-based and biochemical assays. User-defined protocols are protocols created by a laboratory to meet a specific laboratory need. Running and analyzing both of these types of protocols follows the instructions below. 28 Promega Corporation · 2800 Woods Hollow Road · Madison, WI 53711-5399 USA · Toll Free in USA 800-356-9526 · 608-274-4330 · Fax 608-277-2516 TM470 · Revised 2/20 www.promega.com Importing a Plate Map Prior to starting a user-defined or preset protocol, the user may choose to modify the global plate map by using the import function to define the plate being used for this specific assay. At a minimum, plate maps must contain a column of information defining the well location associated with wells in the assay plate. However, plate maps are also able to specify additional data associated with the assay plate that can define the plate map settings required for data analysis after the protocol. The following table specifies the information that can be imported with the plate map. Data Type Requirement Description Well Required Well location in the plate occupied by a sample. Wells can be specified in A1–H12 format or 1–96 format. When specifying wells in 1–96 format, well locations flow down columns (e.g., 1 = Well A1, 2 = Well B1, 8= Well H1, 9 = Well A2) Sample ID Optional The sample identifier associated with the sample in the specified well. Concentration Optional The concentration associated with the specified well. For example, when defining a standard curve or a compound dilution series, the concentration of the sample within the well can be specified. Type Optional The sample type associated with the specified well. Allowed types include: Unknown, Known, Blank, Control 1, Control 2. Sample types correspond to the well types allowed for Analysis (see Section 3.G, Analysis of Results) Dilution Optional The dilution factor applied to the sample in the specified well. This value is used in combination with analyses that interpolate sample concentrations based on a standard curve. Volume Optional The volume of the sample in the specified well. This value is used in combination with analyses that interpolate sample concentrations based on a standard curve. Importing a Plate Map from a File After opening a protocol, follow the steps below to import a file that defines the plate map. The file must contain a table of columns that specify the data types to be imported. A single header row with titles for each column may be present in the file. Minimally, this file will contain columns specifying the Well location for each sample in the plate. The file does not require a specific file extension and may be an Excel, tab-delimited text or commadelimited text file. Follow the steps below to import a plate map file. 1. From the GloMax® Software ‘Home’ screen, tap the Protocols button. 2. Select a preset or user-defined protocol from the ‘Protocols’ screen (see Section 3.C) or create a new protocol (see Section 3.D). 3. Tap the Import button located on the right side of the ‘Protocol-specific’ screen (Figure 32) to display the ‘Sample Data Import’ screen (Figure 33). Promega Corporation · 2800 Woods Hollow Road · Madison, WI 53711-5399 USA · Toll Free in USA 800-356-9526 · 608-274-4330 · Fax 608-277-2516 29 www.promega.com TM470 · Revised 2/20 16622TA Figure 32. Protocol-specific screen. After selecting a preset or user-defined protocol, the individual steps of the protocol are displayed on a protocol-specific screen. Press the Import button on the right side of the screen to import a plate map. 16558TA Figure 33. ‘Sample Data Import’ screen. First screen shown when importing a plate map into the GloMax® Software. 30 Promega Corporation · 2800 Woods Hollow Road · Madison, WI 53711-5399 USA · Toll Free in USA 800-356-9526 · 608-274-4330 · Fax 608-277-2516 TM470 · Revised 2/20 www.promega.com 4. On the ‘Sample Data Import’ screen (Figure 33) provide the following information: Field Requirement Description Enter Plate ID Optional Enter or scan a plate identifier for the plate map file to be imported. The Plate ID is present on the Sample Information tab of Excel exports of the results file. Select File Filter Required The file filter determines the file extensions that are displayed in a folder when you select a file. Options are *.xlsx, *.csv;*.tsv;*.txt, *.xls, and *.* (to show all files). The filter selected will be saved as a default value for the next time a plate map file is imported. Select File Required Using the yellow and red rectangle buttons, you can select the path to the plate map file. Touch the Drive\ button to navigate to the drive location of the desired folder. The current path is indicated by the yellow rectangles at the top of the Select File area. Any folders present within the selected directory are displayed as red, and files that have the extension selected in the file filter are shown in blue. Select the blue plate map file that you wish to import. 5. Once a file has been selected, tap the Open button to open the file and automatically move to the Data tab on the ‘Sample Data Import’ screen (Figure 34). 16559TA Figure 34. Data tab on the ‘Sample Data Import’ screen. Choose the type of data present in each column of the plate import file and then press the Accept button. Promega Corporation · 2800 Woods Hollow Road · Madison, WI 53711-5399 USA · Toll Free in USA 800-356-9526 · 608-274-4330 · Fax 608-277-2516 31 www.promega.com TM470 · Revised 2/20 6. The Data tab on the ‘Sample Data Import’ screen allows the user to identify the information present in each column of the file. At the top of the tab is the Enter Plate ID text box which displays any Plate ID which had been entered on the File tab. If no Plate ID was entered, the Data tab provides another opportunity to enter or scan a Plate ID for this import file. On the top right side of the Data tab is the name of the file that was selected. A table displaying the columns of data found in the import file is shown in the main portion of the screen. Select the type of data present in each column of the file using the drop-down menu at the top of each column. The data types that can be selected are: Well, Sample ID, Concentration, Type, Dilution, Volume and X. You must select which column contains the Well information; all other data types are optional. For columns which should be ignored during import, select X from the drop-down menu. If your import file has a header row that provides descriptive titles for each column, check the Header box on the right side of the table to ignore the Header row during import. When the Header box is checked, the first row of the table will be shaded light blue. All selections made on the Data tab are saved and become the default values selected the next time you import a plate map file. 7. Once all data fields are identified, tap the Accept button to perform the import of data from the file. An ‘Import’ screen is shown summarizing the results of the plate import including the Plate ID, plate format, number of samples present in the file, and the data source for the import file (Figure 35). Tap OK to dismiss the ‘Import’ screen. 8. The Plate View tab is displayed showing a representation of the sample ID and concentration data imported from the file (Figure 36). Sample IDs are shown at the top of the well and any concentration data is shown at the bottom of the well. Three buttons are located at the bottom of the screen: a. Tap the Plate Info button to view a ‘Plate Info’ screen summarizing the same information which was present on the ‘Import’ screen. b. Tap the OK button to accept the imported information and use it to specify the well layout and data for the protocol. The ‘Sample Data Import’ screen closes. c. Tap the Cancel button to discard any imported information or well layout and revert the protocol to using its originally-specified well layout. The ‘Sample Data Import’ screen closes. 9. Once the ‘Sample Data Import’ screen has closed, the user can proceed to run the method as described in Starting a Protocol. 32 Promega Corporation · 2800 Woods Hollow Road · Madison, WI 53711-5399 USA · Toll Free in USA 800-356-9526 · 608-274-4330 · Fax 608-277-2516 TM470 · Revised 2/20 www.promega.com 16560TA Figure 35. ‘Import’ screen. The ‘Import’ screen displays a summary of information from the import of a plate map file. 16561TA Figure 36. Plate View tab. A graphical representation of the plate map file that was imported. Sample ID and Concentration information are displayed. Promega Corporation · 2800 Woods Hollow Road · Madison, WI 53711-5399 USA · Toll Free in USA 800-356-9526 · 608-274-4330 · Fax 608-277-2516 33 www.promega.com TM470 · Revised 2/20 Importing a Plate Map from Portal Software After opening a protocol, follow the steps below to import plate map information from the Portal software. Portal software is a repository of sample and reagent tracking information that is typically installed in combination with the Maxprep™ Liquid Handler (Cat.# AS9100, AS9101, AS9200, AS9201) as part of a modular automation system of Promega instrumentation. Retrieval of plate map information for an assay that was prepared on the Maxprep™ Liquid Handler and stored in Portal can be achieved following the steps below: 1. From the GloMax® Software ‘Home’ screen, tap the Protocols button. 2. Select a preset or user-defined protocol from the ‘Protocols’ screen (see Section 3.C) or create a new protocol (see Section 3.D). 3. Tap the Import button located on the right side of the ‘Protocol-specific’ screen (Figure 37) to display the ‘Sample Data Import’ screen (Figure 38). 16622TA Figure 37. Protocol-specific screen. After selecting a preset or user-defined protocol, the individual steps of the protocol are displayed on a protocol-specific screen. Press the Import button on the right side of the screen to import a plate map. 34 Promega Corporation · 2800 Woods Hollow Road · Madison, WI 53711-5399 USA · Toll Free in USA 800-356-9526 · 608-274-4330 · Fax 608-277-2516 TM470 · Revised 2/20 www.promega.com 16558TA Figure 38. ‘Sample Data Import’ screen. First screen shown when importing a plate map into the GloMax® Software. 4. From the ‘Sample Data Import’ screen, tap the Portal tab (Figure 39). 5. Scan or enter the plate ID into the Enter Plate ID text box. Tap the Search button to search the Portal software for the records associated with the Plate ID. 6. If the search is successful, a ‘Portal Data’ summary screen is shown indicating the method that was used to create the plate map, the date on which the method was completed and the number of samples on the plate (Figure 40). Tap the OK button to dismiss the ‘Portal Data’ screen 7. Tap the Import button to import the plate map retrieved from the Portal software and open the Plate View tab. An ‘Import’ screen is shown, summarizing the results of the plate import including the Plate ID, plate format and number of samples retrieved (Figure 41). Tap OK to dismiss the ‘Import’ screen. 8. The Plate View tab is displayed showing a representation of the sample ID and concentration data imported from the file (Figure 42). Sample IDs are shown at the top of the well and any concentration data is shown at the bottom of the well. Three buttons are located at the bottom of the screen: a. Tap the Plate Info button to view a ‘Plate Info’ screen summarizing the same information which was present on the ‘Import’ screen. b. Tap the OK button to accept the imported information and use it to specify the well layout and data for the protocol. The ‘Sample Data Import’ screen closes. c. Tap the Cancel button to discard any imported information or well layout and revert the protocol to using its originally specified well layout. The ‘Sample Data Import’ screen closes. 9. Once the ‘Sample Data Import’ screen has closed, the user can proceed to run the method as described in Starting a Protocol. Promega Corporation · 2800 Woods Hollow Road · Madison, WI 53711-5399 USA · Toll Free in USA 800-356-9526 · 608-274-4330 · Fax 608-277-2516 35 www.promega.com TM470 · Revised 2/20 16564TA Figure 39. Portal Tab on the ‘Sample Data Import’ screen. Use the Portal tab to retrieve plate map information from the Portal software. 16643TA Figure 40. Example ‘Portal Data’ summary screen. The ‘Portal Data’ screen presents a summary of the data that was retrieved from the Portal software. 36 Promega Corporation · 2800 Woods Hollow Road · Madison, WI 53711-5399 USA · Toll Free in USA 800-356-9526 · 608-274-4330 · Fax 608-277-2516 TM470 · Revised 2/20 www.promega.com 16644TA Figure 41. Example ‘Import’ screen. The ‘Import’ screen displays a summary of information retrieved from the Portal software. 16567TA Figure 42. Plate View tab. A graphical representation of the plate map file that was retrieved from the Portal software. Sample ID and Concentration information are displayed. Promega Corporation · 2800 Woods Hollow Road · Madison, WI 53711-5399 USA · Toll Free in USA 800-356-9526 · 608-274-4330 · Fax 608-277-2516 37 www.promega.com TM470 · Revised 2/20 Clearing Plate Map Information After importing plate maps from a file or the Portal software, you can retain the well map for the plate but discard all sample identifying information. Tap the Well Map button on the protocol-specific screen (Figure 37) to open the ‘Well Selection’ screen (Figure 43). On the ‘Well Selection’ screen, press the Clear button to discard sample specific information but retain the well map. The Clear button is only displayed after a plate map has been imported. Discarding Protocol Changes Any changes that have been made to a protocol can be discarded before that protocol is saved. After changes have been made to a protocol, the Undo All button becomes active. Tap the Undo All button on the protocol-specific screen (Figure 37) to discard all changes since the last save and reload the protocol. This will discard changes to protocol steps and plate maps. 16590TA Figure 43. ‘Well Selection’ screen. 38 Promega Corporation · 2800 Woods Hollow Road · Madison, WI 53711-5399 USA · Toll Free in USA 800-356-9526 · 608-274-4330 · Fax 608-277-2516 TM470 · Revised 2/20 www.promega.com Starting a Protocol 1. Press the Start button on a Preset or User-Defined protocol to begin the process of running a protocol. 2. If the protocol contains steps that require injectors, the ‘Protocol Validation’ screen will appear (Figure 44), allowing the user to prime the injectors before starting the protocol. Tap the Prime button to open the ‘Prime Injectors’ screen (see Section 4.B, Operating the Injector System, for injector priming instructions). Tap the Start button to start the protocol without priming the injectors. This assumes that the user has primed injectors with the reagents to be injected before starting the protocol. Tap the Cancel button to cancel this protocol run and return to the protocol-specific screen. 16568TA Figure 44. ‘Protocol Validation’ screen. When a protocol contains injector steps, the ‘Protocol Validation’ screen is displayed to allow the user to prime the injectors before starting the protocol. 3. The user is requested to provide a name for the protocol run on a ‘Start Protocol’ screen. By default, the name for the run is the name of the protocol with the current date and time appended to the end. Press the Start button on the ‘Start Protocol’ screen to begin the protocol. 4. As a protocol is running, the plate map will automatically appear on the screen, and the data will appear as they are collected. If multiple reads of the plate are performed, each result can be displayed by selecting the step that generated that result in the left navigation column. 5. When injectors have been used in a protocol, the ‘Clean Up’ screen is displayed after the protocol is completed (Figure 45). Tap the Flush button to open the ‘Flush’ screen allowing the user to flush the injectors at the completion of the method (see Section 4.B, Operating the Injector System for injector flush instructions). Tap the Cancel button to close the ‘Clean Up’ screen and complete the method without flushing the injectors. Note: To prevent clogging of the fluid lines, we recommend flushing the injectors after each use. 16569TA Figure 45. ‘Clean Up’ screen. When a protocol that uses injectors is completed, the ‘Clean Up’ screen is displayed allowing the user to flush the injector system. Promega Corporation · 2800 Woods Hollow Road · Madison, WI 53711-5399 USA · Toll Free in USA 800-356-9526 · 608-274-4330 · Fax 608-277-2516 39 www.promega.com TM470 · Revised 2/20 6. Once the protocol is finished, results are shown in a heat map format to indicate wells with higher or lower signals in comparison to the entire plate (Figure 46, Panel A). The software automatically scales the color selection, assigning the highest values red and the lowest values blue, along a gradient (Figure 46, Panel B). To turn off the heat mapping of the data, touch the small plate map button at the top right side of the information bar above the data plate map. Touch the ellipsis to the left of the small plate map button to enter notes that will appear in the information bar. A. 11652TA Turn the heat map on or off. Select measurement 1 (e.g., Lumi) or measurement 2 (e.g., Fluo) to view results. B. 11834MA 7.56e+07 1.02e+07 1.03e+06 9.82e+04 1.31e+04 3.22e+03 298 72 Figure 46. Results plate map with heat map display (Panel A) and example of heat map colors applied to the results in the plate map (Panel B). Within the plate map, each individual sample may be viewed by tapping the well of interest (Figure 47). 40 Promega Corporation · 2800 Woods Hollow Road · Madison, WI 53711-5399 USA · Toll Free in USA 800-356-9526 · 608-274-4330 · Fax 608-277-2516 TM470 · Revised 2/20 www.promega.com 3.D. Running a Protocol (continued) Kinetic results display a graphical representation of the data during the course of the kinetics read (Figure 48). Data are automatically scaled based on the results within each well. Zoom in to view the axis for each well as desired. Users can use touch-screen gestures to zoom in or out, or to pan the well map. 11653TA Figure 47. Example of individual well result for kinetic data. 11654TA Figure 48. Results plate map for kinetic data. Promega Corporation · 2800 Woods Hollow Road · Madison, WI 53711-5399 USA · Toll Free in USA 800-356-9526 · 608-274-4330 · Fax 608-277-2516 41 www.promega.com TM470 · Revised 2/20 4. In addition to viewing the data resulting from the protocol, the buttons to the lower left of the screen can be used to start an Analysis of these results or Export results. a. To analyze data, tap the Analysis button (bottom left corner of screen in Figure 48). Analysis functionality is described in Section 3.F, Analysis of Results. For certain result types (e.g., protocols containing kinetic reads), the Analysis button will be inactive because analysis is not supported for these protocol types. b. To export data, tap the Export button (bottom left corner of screen in Figure 48). The software will export the data to the manual export folder specified by the Administrator settings (see Section 3.H, Administrator Settings). By default data is exported in the following formats: a comma-separated value (.csv) file and a GloMax® portable data format (.raw) file. Depending on administrator settings, the data can also be exported as a Microsoft Excel® workbook (.xlsx) file and a Portable Document Format (.pdf) file. When interfacing with a LIMS, we recommend using the .csv file and importing according to your LIMS software guidelines. After export is complete the ‘Export’ screen is displayed (Figure 49). Tap the Open button to open the export location in a Windows® file browser, or tap the Done button to exit the ‘Export’ screen and return to the results plate map. 15144TA Figure 49. Export of results. This screen is displayed upon the successful export of results to the administrator-defined manual export location. Use the Open button to open the export location in a Windows® file browser or tap the Done button to return to the results plate map. 42 Promega Corporation · 2800 Woods Hollow Road · Madison, WI 53711-5399 USA · Toll Free in USA 800-356-9526 · 608-274-4330 · Fax 608-277-2516 TM470 · Revised 2/20 www.promega.com 3.D. Running a Protocol (continued) The exported Excel® file can be opened directly within Microsoft Excel® or Excel® viewer (Figure 50). Multiple tabs are located in the spreadsheet to view the data in plate map format or linear format by well. The following table shows the information in each tab of the Excel® export file. F 11656TA igure 50. Results export to Microsoft Excel® workbook. Promega Corporation · 2800 Woods Hollow Road · Madison, WI 53711-5399 USA · Toll Free in USA 800-356-9526 · 608-274-4330 · Fax 608-277-2516 43 www.promega.com TM470 · Revised 2/20 Table 1. Excel® Export Tab Information. Tab Name Description Protocol Name Information regarding the protocol, user, date, instrument, serial number, firmware version, software version, plate type Results Read parameters and plate map view of the data with heat map colors applied Results By Well Readings taken displayed by well. Columns include: n Read number Time By Well (sec) Elapsed time since the first read in the well Time By Plate(s) Elapsed time since the first read in the plate Value Raw data for the read Part Not Applicable Results Table (Kinetic and Loop Reads Only) Table format of data from all reads. Columns include: Read Type Luminescence Read Number The read number for the row of data Row time (sec) Time in seconds for the first read of the row Row time (min) Time in minutes for the first read of the row Well Number Columns indicating the well for each read Part Not Applicable Loop# (Loop Only) Indicator of loop number Iteration# (Nested Loops Only) Indicator of loop iteration Results Charts (Kinetic Reads only) Graphical display of the plate map with kinetic read curves Sample Information (Imported Plate Maps only) Display of Plate ID and plate map information imported into the protocol. 5. Upon completion of the protocol, the results are saved to the list of results accessible through the ‘Results, Templates and Analyses screen’. See Section 3.E, ‘Results, Templates and Analyses’ Screen for instructions on accessing saved results. 44 Promega Corporation · 2800 Woods Hollow Road · Madison, WI 53711-5399 USA · Toll Free in USA 800-356-9526 · 608-274-4330 · Fax 608-277-2516 TM470 · Revised 2/20 www.promega.com 3.E. ‘Results, Templates and Analyses’ Screen The ‘Results, Templates and Analyses’ screen is where the user can access any saved results, analysis templates and data analyses. From this screen, results, templates and analyses can be viewed, exported, imported or deleted. 1. To view a list of results from previous runs, analysis templates that have been created or data analyses that have been performed, from the ‘Home’ screen, tap the Results button. 2. The Left Navigation column of the ‘Results, Templates and Analyses’ screen presents the user with several options regarding the displayed information and functions that can be performed. At the top of the Left Navigation column are functions to filter the list of displayed results, templates or analyses. a. At the top of the Left Navigation column, the user can filter the displayed information by time period using the calendar search boxes. Use the Start Date and End Date buttons to specify a date range over which to view results, templates or analyses. These buttons will open a calendar on which the start date and end date can be selected. Press the All button to view all results, templates or analyses. b. Results, templates and analyses can also be filtered using a keyword search for text in the Name, User and Info columns. Touch the Search button to open the on-screen keyboard and enter a search term. c. Users can add identifying information to any list entry for results, templates or analyses. Check the boxes on the right side of the list entries to select those entries. Touch the Info… button to enter identifying information and associate it with the selected list entries. 3. In the center of the Left Navigation column, the user can press the Results, Templates or Analyses buttons to view the corresponding lists of entries. Creating Analysis Templates and performing Analyses are covered in Section 3.F, Analysis of Results. 4. At the bottom of the Left Navigation column, the user can Export, Import or Remove selected list items. These functions are described in depth below. 5. Touch any of the list entries to view the associated results, template or analysis. Promega Corporation · 2800 Woods Hollow Road · Madison, WI 53711-5399 USA · Toll Free in USA 800-356-9526 · 608-274-4330 · Fax 608-277-2516 45 www.promega.com TM470 · Revised 2/20 ‘Results, Templates and Analysis’ Screen Functions The functions present on the ‘Results, Templates and Analysis’ screen allow users to Export, Import and Remove items (Figure 51), which are described below. For analysis templates, there is also a function to create a New Template that will be covered in Section 3.F, Analysis of Results. 11651TA View results within a group by sorting on date/time, name or user. Export, Import, Remove functions. Touch checkbox to select one or more results files to add identifying information, remove or export. Figure 51. ‘Results, Templates and Analysis’ screen functions. This screen is used to display Results that have been generated, analysis Templates and data Analyses. Export, Import and Remove buttons in the lower left corner of the screen can be used to perform their indicated functions. 1. Exporting Results, Templates and Analyses Results, Templates and Analysis that have been created by a user can be exported from the GloMax® software in a variety of file formats as specified by the administrator (see Section 3.H, Administrator Settings). By default results files are exported in a comma-delimited (.csv) and a proprietary portable data format (.raw) that can be imported into the GloMax® software on another PC. Administrators can also specify that results files be exported in Microsoft Excel® (.xlsx) and/or Adobe PDF (.pdf) format. Templates and Analyses are exported from this screen using proprietary portable formats (.template and .analysis) that can be imported into the GloMax® software on another PC. 46 Promega Corporation · 2800 Woods Hollow Road · Madison, WI 53711-5399 USA · Toll Free in USA 800-356-9526 · 608-274-4330 · Fax 608-277-2516 TM470 · Revised 2/20 www.promega.com 3.E. ‘Results, Templates and Analyses’ Screen (continued) 1. Exporting Results, Templates and Analyses (continued) Export existing results, templates or analyses by performing the following steps: a. From the ‘Home’ screen, touch the Results button. b. On the left side of the ‘Results, Templates and Analyses’ screen, touch the Results, Templates or Analyses button to access the appropriate list of items for export. c. Check the boxes on the right side of the item(s) that you wish to export. You can use the checkbox in the header of the table to select/deselect all displayed list items. When items have been selected, the Export button near the bottom left side of the screen becomes active (Figure 52). d. Touch Export to export the selected item(s). All exported files will be saved in the Administratorspecified manual export path and have the date and time of the export appended to the name. Fi 13842TA gure 52. Functions of the ‘Results, Templates and Analyses’ screen. From the ‘Results, Templates and Analyses’ screen, you can Export or Remove one or more list items, Import a result, template or analysis (.raw, .template, .analysis) file or create a New Template. Promega Corporation · 2800 Woods Hollow Road · Madison, WI 53711-5399 USA · Toll Free in USA 800-356-9526 · 608-274-4330 · Fax 608-277-2516 47 www.promega.com TM470 · Revised 2/20 2. Importing Results, Templates and Analyses Results, templates and analyses that have been exported from the GloMax® software can be imported for use on another PC running the GloMax® software. Perform the following steps to import results, templates or analyses: a. From the ‘Home’ screen, touch the Results button. b. On the left side of the ‘Results, Templates and Analyses’ screen, touch the Results, Templates or Analyses button to import a file appropriate for the desired list. c. Touch the Import button near the bottom left side of the screen to open the ‘Import Results’, Import Templates’ or ‘Import Analyses’ screen, depending on the current list being viewed (Figure 53). d. Navigate to the location of the file(s) you wish to import. The yellow boxes across the top of the screen indicate the currently selected path. Red boxes in the lower portion of the screen represent folders, and blue boxes in the lower portion of the screen represent files with the extension appropriate for the list currently being viewed. Results will have a (.raw) extension, templates will have a (.template) extension and analyses will have a (.analysis) extension. Touch the desired file(s) to import. Selected files will have a yellow border around the blue box. e. Touch OK to import the selected file(s) into the list. 15142TA Figure 53. Importing Results, Templates or Analyses. Use the file browser screen to browse to the location of the desired import file. 48 Promega Corporation · 2800 Woods Hollow Road · Madison, WI 53711-5399 USA · Toll Free in USA 800-356-9526 · 608-274-4330 · Fax 608-277-2516 TM470 · Revised 2/20 www.promega.com 3.E. ‘Results, Templates and Analyses’ Screen (continued) 3. Deleting Results, Templates and Analyses Results, Templates and Analyses can be deleted from the GloMax® software by performing the following steps: a. From the ‘Home’ screen, touch the Results button. b. On the left side of the ‘Results, Templates ans Analyses’ screen, touch the Results, Templates or Analyses button to view the desired list. c. Check the boxes on the right side of the list items that you wish to delete. Use the checkbox in the header of the table to select/deselect all displayed list items. When list items have been selected, the Remove button near the bottom left side of the screen becomes active. d. Touch the Remove button on the bottom left side of the screen. You will be prompted to confirm that you wish to delete the selected list items. Select Yes to permanently remove the selected list items or No to cancel this action. 3.F. Analysis of Results Analysis features provide a means of interpolating unknowns from a standard curve, analyzing data for linearity, estimating EC50/IC50 and determining Z´-Factor. Analysis templates guide analysis and dictate what calculations will be applied to the data. Creating an analysis template includes defining the curve fit type, data types, well naming, concentrations/dilution factors and units that will be applied to the analysis of raw data from a plate read operation. Note: The analysis functions inherent to the GloMax® software analyze data that have been generated on a GloMax® Instrument. It is the responsibility of the individual researcher to apply the analysis curve fit type that best fits the data and evaluate the results of any analyses for validity and accuracy. The workflow for analyzing data includes: • Opening a Result file. • Applying an analysis template. • Performing an analysis. • Editing the result graph. • Saving and exporting the analysis. Promega Corporation · 2800 Woods Hollow Road · Madison, WI 53711-5399 USA · Toll Free in USA 800-356-9526 · 608-274-4330 · Fax 608-277-2516 49 www.promega.com TM470 · Revised 2/20 Opening a Result File 1. Results are accessed in two ways: on the screen immediately following the completion of a plate read or from the ‘Results’ screen. To access the ‘Results’ screen, from the ‘Home’ screen tap the Results button. 2. The middle section of the Left Navigation column allows users to toggle the display on this screen between Results, Templates and Analyses (Figure 54). 11651TA View results within a group by sorting on date/time, name or user. Export, Import, Remove functions. Touch checkbox to select one or more results files to add identifying information, remove or export. Figure 54. The ‘Results, Templates and Analyses’ screen. 3. Tap the Result file of interest. 4. Select the Analysis button in the lower left corner of the screen. Applying a Pre-Existing Analysis Template The analysis software contains example templates that can be used for data analysis as they are provided, or they can be modified to create a custom analysis template for your experimental needs. 1. Opening a result file will take the user to the ‘Templates’ screen. 2. Select the saved template from the list. 50 Promega Corporation · 2800 Woods Hollow Road · Madison, WI 53711-5399 USA · Toll Free in USA 800-356-9526 · 608-274-4330 · Fax 608-277-2516 TM470 · Revised 2/20 www.promega.com 3.F. Analysis of Results (continued) Applying a Pre-Existing Analysis Template (continued) 3. When opening a result file containing two reads, the software will prompt the user to either take a ratio of those two reads or proceed with analysis without taking a ratio. If prompted, select the formula mode before proceeding to application of an analysis template: Div (r1/r2) and Div (r2/r1): The user dictates which read is in the numerator and which read is in the denominator. The ratio options are only available for read files containing two plate reads. After computing ratio, select Continue to proceed with analysis of the ratiometric data. These options might be chosen if a ratio of two absorbance measurements is desired or if one wishes to compute a ratio of an experimental and control reporter prior to analysis. Export Ratio: If no further analysis of the ratio is desired, selecting Export Ratio will export the ratio directly to Excel®. This option might be chosen if a ratio of two absorbance measurements is desired and with no further analysis performed. Multiple Reads: Choose this option if the multiple reads shall be analyzed separately without taking a ratio. This option might be chosen if a multiplexed assay was performed consisting of two different plate reads, with each to be analyzed separately. 15156TA Figure 55. Compute a ratio of a two-read result file, or select Multiple reads to analyze each read separately. Creating a New Analysis Template New analysis templates can be created prior to Analysis, or they can be created over existing data and saved to the Templates list. Analysis templates can be applied to result files consisting of one read, or multiple reads. Promega Corporation · 2800 Woods Hollow Road · Madison, WI 53711-5399 USA · Toll Free in USA 800-356-9526 · 608-274-4330 · Fax 608-277-2516 51 www.promega.com TM470 · Revised 2/20 1. Select New in the lower left corner of the ‘Templates’ screen. Note: If you have imported a plate map that specifies the Sample ID, Type, Concentration, Dilution and/or Volume of the wells on the plate, selecting the New button will open a template with all of the information from the imported plate map prepopulated. If all information is specified in the plate map import, you can simply select the analysis curve fit type and run the analysis more easily. 2. When opening a result file containing two reads, the software will prompt the user to either take a ratio of those two reads or proceed with analysis without taking a ratio. Select the formula mode before proceeding to application of an analysis template. See descriptions of formula mode options in Applying a Pre-Existing Analysis Template. 3. The ‘New Template’ screen will open with analysis options on the left side and a plate map on the right side (Figure 56). 15145TA Figure 56. New Template creation. From this screen the user will define the curve fit type, units, well types, concentrations/dilution factors and names in the analysis template. 52 Promega Corporation · 2800 Woods Hollow Road · Madison, WI 53711-5399 USA · Toll Free in USA 800-356-9526 · 608-274-4330 · Fax 608-277-2516 TM470 · Revised 2/20 www.promega.com 4. Touch the drop-down menu at the top left side of the screen to select the Curve Fit type for this template. There are 11 analysis curve fit types to choose from. The following tables highlight each analysis curve fit type, the function of each analysis and the formula used. Table 2. Analysis Curve Fit Types That Allow Assignment of Known, Unknown, Blank, Control 1 and Control 2 Well Types. Analysis Curve Fit Type Function of Analysis Type Analysis Formula Linear Standard Curve Linear regression; interpolate Unknown concentration from curve y = f(x) = mx + b 2nd Polynomial Nonlinear regression, second order; interpolate Unknown concentration from curve f(x) = a + bx + cx2 3rd Polynomial Nonlinear regression, third order; interpolate Unknown concentration from curve f(x) = a + bx + cx2 + dx3 Power Regression Nonlinear regression; interpolate Unknown concentration from curve f(x) = axb Four-Parameter Curve Nonlinear regression; interpolate Unknown concentration from curve; EC50/IC50 determination f(x) = B + T – B 1 + 10(logIC50–logx)S Five-Parameter Curve Nonlinear regression; interpolate Unknown concentration from curve; EC50/IC50 determination f(x) = B + T – B (1 + 10(logIC50–logx)S)S Table 3. Analysis Curve Fit Types That Allow Assignment of Known, Blank, Control 1 and Control 2 Well Types. Analysis Curve Fit Type Function of Analysis Type Analysis Formula Dose Response EC50/IC50 Nonlinear regression; four-parameter curve fit; EC50/IC50 determination f(x) = B + T – B 1 + 10(logIC50–logx)S Linear Response Linear regression y = f(x) = mx + b Point to Point Connects points together with a straight line No formula assigned Cubic Spline Connects points together with a smooth line No formula assigned Z´-Factor Calculates Z´-Factor Z´-Factor = 1 – 3(s1 + s2 ) |µ1 – µ2 | 5. Touch the Units text box to open a keyboard and specify the unit of measurement for concentration on the entire plate. Only one unit of concentration can be specified for the plate. Select Insert in the lower right corner of the keyboard to access a list of Greek letters and characters, fractions or other commonly used scientific labels. ( ) ( ( ( ) ) ) Promega Corporation · 2800 Woods Hollow Road · Madison, WI 53711-5399 USA · Toll Free in USA 800-356-9526 · 608-274-4330 · Fax 608-277-2516 53 www.promega.com TM470 · Revised 2/20 6. Touch and drag to select wells on the plate map that will contain samples of a given type. From the Well Type drop-down box select the corresponding well type (Unknown, Known, Blank, Control) that you wish to assign to those wells (Figure 57). For any Unknown wells, the user also may enter a sample volume. To select nonadjacent wells, touch a well and hold down until a rectangle appears, and continue with selection. 15146TA Figure 57. Template with well designations assigned. In this figure unknown, known and blank well designations have been assigned across a plate. 54 Promega Corporation · 2800 Woods Hollow Road · Madison, WI 53711-5399 USA · Toll Free in USA 800-356-9526 · 608-274-4330 · Fax 608-277-2516 TM470 · Revised 2/20 www.promega.com 3.F. Analysis of Results (continued) Creating a New Analysis Template (continued) Well Type Descriptions: Unknown: A well where the concentration of the sample is unknown. It is possible to set a name, dilution factor and volume for this type of well. Known: A well where the concentration of the sample is known. You can set a name and concentration for this type of well. Blank: A well containing a blank for the experimental data set. The average values of all blank wells will be subtracted from all Known, Unknown and Control wells prior to analysis. Control: Two controls may be selected, indicated as Control 1 and Control 2. Both Controls are required for Z´-Factor analysis. Only one control may be used for % Control and Fold-Change data normalization. Blanks are subtracted from experimental wells as part of the analysis. Blanks that are assigned to a specific group will be subtracted from that group. Blanks not assigned to a group will be subtracted globally from any non-blank sample well. Two blank options are included for dual-read result files: (R1–BR1)/(R2–BR2) or (R2–BR2)/(R1–BR1): Pending how the ratio of the dual-read result is computed (Figure 55), the numerator or denominator will include the subtraction of the associated blank from Read 1 (R1) or Read 2 (R2) accordingly. This blank option is applicable to dual-read assay result files such as those generated with the Nano-Glo® Dual-Luciferase® Reporter Assay System. (R1/R2) – (R1B/R2B): A ratio of the blank from read 1 and read 2 can be subtracted from the ratio of the reads from the experimental wells. 7. After assigning the well types on the plate, select the wells, which all should be named the same (e.g., all wells that contain the same sample or treatment set). Once the wells are selected, touch the Name text box and enter the name that should be applied to all of the selected wells (Figure 58). Note: To be considered a complete data set, all Known wells within a given treatment set or standard curve set must have the same name. For example, if naming the Known wells for a standard curve, use an identical name (“Standard”, “Stand”, “Known”). For Unknown wells, all wells of the same sample (regardless of dilution factor) should have the same name even if they are not replicates of one another. The identical names ensure the software applies the same analysis function to the wells. As the template is created, replicates are identified using a combination of Well Type, Name, Concentration/Dilution Factor and Volume. The number in the upper right corner signifies the replicate number for that well. Promega Corporation · 2800 Woods Hollow Road · Madison, WI 53711-5399 USA · Toll Free in USA 800-356-9526 · 608-274-4330 · Fax 608-277-2516 55 www.promega.com TM470 · Revised 2/2015147TA Figure 58. Well naming. Well names assigned to individual wells. S1–S4 names have been assigned to Unknown wells containing replicates of individual samples. STAND name has been applied to the replicates in the standard curve, and BLANK has been assigned to the Blank wells. 56 Promega Corporation · 2800 Woods Hollow Road · Madison, WI 53711-5399 USA · Toll Free in USA 800-356-9526 · 608-274-4330 · Fax 608-277-2516 TM470 · Revised 2/20 www.promega.com 3.F. Analysis of Results (continued) Creating a New Analysis Template (continued) 8. Select all wells that have the same dilution factor or volume. Once the wells are selected, touch the Concentration or Dilution text box and assign the concentration or dilution factor value to the selected wells (Figure 59). For Unknowns, input a Volume (in µl) that represents sample input volume in the well. For example, if 1µl of sample volume was placed into the well, 1µl volume should be entered in the Volume (µl) box. Note: The Clear button can be applied if a mistake is made during template creation. Clearing a well removes all well type, naming, concentration/dilution factor and volume information associated with the well. 15148TA Figure 59. Concentrations and dilution factors. In this figure, concentrations have been applied to the standard curve replicates (shown at the bottom of each well). Dilution factors have been applied to the Unknowns (100 for wells A1–D8, 200 for wells E1–H8). A volume of 1µl has been assigned to the Unknown wells. Promega Corporation · 2800 Woods Hollow Road · Madison, WI 53711-5399 USA · Toll Free in USA 800-356-9526 · 608-274-4330 · Fax 608-277-2516 57 www.promega.com TM470 · Revised 2/20 9. After all well types, names and concentrations/dilution factors and volumes have been applied to the plate map, select all wells that define an experimental set, or Group, that should all be analyzed together. All Known wells will appear on the graph. Unknown wells will be interpolated from the Known well standard curve. a. Touch the Group drop-down to expand the list of Group options. Up to eleven Groups (A–K) can be assigned to a plate. The dashed black line in the lower right corner of the Group drop-down menu will undo a Group assignment. b. Choose a Group from the Group drop-down and apply to the selected wells. Once a Group has been assigned, the frames of the selected wells will highlight with the corresponding Group color. 15149TA Figure 60. Use Group to define an experimental data set. The entire plate was selected (wells A1 through H12) and Group A applied. Up to 11 groups may be selected at a time. 58 Promega Corporation · 2800 Woods Hollow Road · Madison, WI 53711-5399 USA · Toll Free in USA 800-356-9526 · 608-274-4330 · Fax 608-277-2516 TM470 · Revised 2/20 www.promega.com 3.F. Analysis of Results (continued) Creating a New Analysis Template (continued) GloMax® Analysis software can analyze and graph multiple experimental data sets. When multiple groups exist on a single plate, well frames will be color coded to indicate individual groups (Figure 61). 15150TA Figure 61. Multiple experimental data sets. When creating an analysis template with multiple experimental data sets, select all the wells that are part of each data set (containing Known, Unknown and Blank wells that should be analyzed together) and assign a group from the Group drop-down menu. A unique color will be applied to each group. Promega Corporation · 2800 Woods Hollow Road · Madison, WI 53711-5399 USA · Toll Free in USA 800-356-9526 · 608-274-4330 · Fax 608-277-2516 59 www.promega.com TM470 · Revised 2/20 c. If desired, open a keyboard to edit the group name text by selecting the icon in the lower right corner of each Group letter in the Group drop-down menu (Figure 62). Edited Group name will be shown in the graph legend for the respective curve (Figure 63). 15151TA Figure 62. Select the icon in the lower right corner of each Group to edit the group label. 60 Promega Corporation · 2800 Woods Hollow Road · Madison, WI 53711-5399 USA · Toll Free in USA 800-356-9526 · 608-274-4330 · Fax 608-277-2516 TM470 · Revised 2/20 www.promega.com 3.F. Analysis of Results (continued) Creating a New Analysis Template (continued) 15152TA Figure 63. Type a new name for the Group label. Edited text will appear in the Group drop-down menu and in the graph legend. Promega Corporation · 2800 Woods Hollow Road · Madison, WI 53711-5399 USA · Toll Free in USA 800-356-9526 · 608-274-4330 · Fax 608-277-2516 61 www.promega.com TM470 · Revised 2/20 10. Data normalization allows results to be expressed as either % Control or Fold-Change if desired. Normalization can be performed either before or after an analysis has been completed. Normalization requires the inclusion of a Control well type on the analysis template. Note: If Control wells are to be included on the graph then they must first be assigned as a Known well type within each experimental data set. a. Highlight the wells to assign as a control. From the Well Type drop-down menu, assign those wells as either Control 1 or Control 2 (Figure 64). Note: Data can be normalized to only one control at a time. The Normalize button becomes active once a control has been assigned to the plate. 15153TA Figure 64. Control well assignment. A Control well type must be assigned in order to perform data normalization to % Control or Fold Change. The Normalize button becomes active once a Control has been assigned to the plate. 62 Promega Corporation · 2800 Woods Hollow Road · Madison, WI 53711-5399 USA · Toll Free in USA 800-356-9526 · 608-274-4330 · Fax 608-277-2516 TM470 · Revised 2/20 www.promega.com 3.F. Analysis of Results (continued) Creating a New Analysis Template (continued) b. Touch the Normalize button to access three options for normalization (Figure 65, Panel A). If only one control has been assigned to the plate, that control is automatically chosen for normalization. If more than one control is assigned to the plate, the user must specify which control to choose for normalization (Figure 65, Panel B). i. Data: Undo any normalization performed on the plate. ii. % Control: Experimental wells will be expressed as a % response relative to the control wells. iii. Fold Change: Experimental wells will be expressed as fold response relative to the control wells. Figure 65. Data normalization. Panel A. There are two options for data normalization, % Control and Fold Change, and an option to undo normalization, Data. After selecting the normalization mode, normalization will automatically assign the control that is present on the plate. Panel B. If there are two controls on the plate, the user must specify which control to use for normalization. c. Select OK to automatically normalize or undo normalization accordingly. If there are raw data present in the wells, normalization of the results occurs once OK is pressed. 11. Once the user has defined the analysis template, touch the Save Template button. When prompted, enter a name for the template, and then select OK. The name of the analysis template will now appear in the title bar and in the list of available analysis templates on the ‘Templates’ screen. Performing an Analysis 1. Once a template has been assigned to the result file, touch the green Run button near the bottom of the left side of the screen to perform the analysis of samples (Figure 66). When the analysis is completed, an “Analysis has successfully completed” message will appear on the screen. Select OK to view the results. Selecting Run will initiate the analysis. The average value of the blanks will be subtracted from the Known and Unknown wells. Averages and Standard Deviations (if there are greater than three replicates of each concentration) will be calculated for replicates and will be indicated in the data report. The analysis curve fit will be applied and a graph will be generated of the analyzed data. A. B. 15141TA Promega Corporation · 2800 Woods Hollow Road · Madison, WI 53711-5399 USA · Toll Free in USA 800-356-9526 · 608-274-4330 · Fax 608-277-2516 63 www.promega.com TM470 · Revised 2/20 15139TA Figure 66. Once a template has been applied to the data, touch the Run button to analyze the results. Note: Any changes made to the template (including the addition of Controls and performing data normalization) will require re-running the analysis in order to view the changes on the graph. 2. Performing the analysis will generate a best-fit curve of the data shown on the graphing tab of the ‘Analysis’ screen. The graphing tab will remain inactive until the Run button has been pressed. Depending on the type of curve fit applied to the data, the following information will be created as a result of pressing the Run button. The analysis formula is shown on the graph. Summarized statistical information for each curve is included in the graph legend. Additional statistical information is included in the data report. 64 Promega Corporation · 2800 Woods Hollow Road · Madison, WI 53711-5399 USA · Toll Free in USA 800-356-9526 · 608-274-4330 · Fax 608-277-2516 TM470 · Revised 2/20 www.promega.com 3.F. Analysis of Results (continued) Performing an Analysis (continued) Table 4. Summary of Statistical Information that is Generated from Performing an Analysis. Analysis Curve Fit Type Analysis Formula Shown on Graph Data Shown in Graph Legend Additional Information Included in Data Report Linear Standard Curve y = f(x) = mx + b R2 Slope, Intercept 2nd Polynomial f(x) = a + bx + cx2 R2 A, B, C 3rd Polynomial f(x) = a + bx + cx2 + dx3 R2 A, B, C, D Power Regression f(x) = axb R2 A, B Four-Parameter Curve f(x) = B + T – B R2 , IC50 Slope, Bottom, Top 1 + 10(logIC50–logx)S Five-Parameter Curve f(x) = B + T – B R2 , IC50 Slope, Bottom, Top, (1 + 10 Asymmetry Factor (S) (logIC50–logx)S)S Dose Response EC50/IC50 f(x) = B + T – B R2 , IC50 Slope, Bottom, Top 1 + 10(logIC50–logx)S Linear Response y = f(x) = mx + b R2 Slope, Intercept Point to Point No formula used No additional information included No additional information included Cubic Spline No formula used No additional information included No additional information included Z´-Factor Z´-Factor = 1 – 3(s1 + s2 ) Z´-Factor Value No additional information |µ included 1 – µ2 | Data from the plate read will be populated in the center of the wells on the plate map. To view results of a single-read analysis, toggle the data displayed in the wells of the plate using the Data On/Off button at the top of the screen (Figure 66). To view results from a multi-read analysis, touch the associated data tab for each read located at the top of the screen. To view raw or analyzed data from dual-read result files, toggle the data view by pressing the Ratio On/Off, Data 1 On/Off and Data 2 On/Off buttons at the top of the screen. 3. After the analysis has been run, touch the Graphing Tab on the right side of the screen to view the graph of the results. ( ) ( ( ( ) ) ) Promega Corporation · 2800 Woods Hollow Road · Madison, WI 53711-5399 USA · Toll Free in USA 800-356-9526 · 608-274-4330 · Fax 608-277-2516 65 www.promega.com TM470 · Revised 2/20 Editing the Result Graph 1. Adjust details on the graphing tab to modify the appearance of the graph. Use the checkboxes for Log X-Axis and Log Y-Axis to specify whether the desired axis should be displayed as a log scale. Touch Graph title, X axis title or Y axis title to change the name of the selected title. Use tablet gestures to zoom in or pan the graph (pinch to zoom out, reverse pinch to zoom in, swipe to pan). Touch the Reset View button to return the graph to the default display (Figure 67). 13896TA Figure 67. After selecting the Run button to analyze an experimental data set, the graphing tab on the right side of the screen becomes active. Touch the graphing tab to view analysis results. From this tab, Axes can be displayed as linear or log format, axis and graph titles can be modified, and the graph can be panned or zoomed. Touch Reset View to return the graph to the default view. 66 Promega Corporation · 2800 Woods Hollow Road · Madison, WI 53711-5399 USA · Toll Free in USA 800-356-9526 · 608-274-4330 · Fax 608-277-2516 TM470 · Revised 2/20 www.promega.com 3.F. Analysis of Results (continued) Editing the Result Graph (continued) 2. An expandable legend is located in the lower right corner of the graph. Touch anywhere within the legend box to expand the legend view (Figure 68, Panel A). Multiple curves may be present on the graph pending the number of groups assigned to the analysis template and/or the number of times that a plate has been read. Line color is associated with each experimental data set, or Group, assigned to the analysis template. Line symbols are associated with each time the plate is read for that group (Figure 68, Panel A). An analysis of a result file consisting of two Groups and one read of each Group would generate single curves of different color representing each Group. An analysis of a result file consisting of one Group that is read multiple times would generate a multi-curve graph where all lines are the same color as indicated by the group, with each line having a unique symbol associated with each read of that group. 3. Touching the symbol will remove a curve from the graph (Figure 68, Panel B). Add the curve back to the graph by touching the empty circle. Figure 68. Colors represent groups; curves represent reads of each group. Panel A. Two groups are represented on the graph, with one read for each group. Note: Edited group names are shown on the graph. Panel B. Touching the symbol for any curve will remove that curve from the graph. Touch the empty circle to add the curve back to the graph. 4. Outliers can be excluded by touching the outlier point in the Data Tab, and then touching the Exclude button. After excluding outliers, touch the Run button to reanalyze the data with outliers removed. 15140TA A. B. 15140TA A. B. Promega Corporation · 2800 Woods Hollow Road · Madison, WI 53711-5399 USA · Toll Free in USA 800-356-9526 · 608-274-4330 · Fax 608-277-2516 67 www.promega.com TM470 · Revised 2/20 Saving and Exporting the Analysis Once you are satisfied with the results of the analysis, touch the Save Analysis button to save this analysis with a user-specified name within the list of Analyses on the ‘Analyses’ screen. The analysis can be exported at the time that it is completed by touching the Export button in the bottom left corner of the screen. Analyses will be exported in the formats specified by the administrator (.xlsx, .pdf, or .analysis data reports) and are exported to the location specified by the Administrator (see Section 3.H, Administrator Settings). Alternatively, the saved analysis can be exported from the Analyses screen at a later time. See the Results, Templates and Analyses section (Section 3.E) for detailed descriptions of these file types and configuration of the export folder location. Exporting Concentration Data from an Analysis to Portal The GloMax® Software supports the export of interpolated concentration data to Portal software. Analysis curve fit equations that support interpolation of concentrations are: Linear Standard Curve, 2nd Polynomial, 3rd Polynomial, Power Regression, Four-Parameter Curve and Five-Parameter Curve. If you have used one of these curve fit types and are connected to Portal software, a Portal… button is displayed beneath the Run button. After the analysis has been run, the Portal… button becomes active. To export sample concentration data from the analysis to Portal software, follow the steps below: 1. After running the analysis and assessing your data, press the Portal… button to open the ‘Portal Data Export’ screen (Figure 69). 2. The ‘Portal Data Export’ screen (Figure 70) lists all the concentration assays into which concentration data can be imported. Concentration assays are described in the Portal Access Technical Manual #TM549. Only assays which have a single concentration target are listed on the ‘Portal Data Export’ screen. Select the concentration assay into which concentration data should be imported. 3. Press the Export button to export assays into Portal software. A summary screen is presented that indicates the number of samples that were exported. 68 Promega Corporation · 2800 Woods Hollow Road · Madison, WI 53711-5399 USA · Toll Free in USA 800-356-9526 · 608-274-4330 · Fax 608-277-2516 TM470 · Revised 2/20 www.promega.com 16570TA Figure 69. Analysis screen displaying the Portal button. 16571TA Figure 70. ‘Portal Data Export’ screen. Select the concentration assay into which concentration data should be imported and press the Export button. Promega Corporation · 2800 Woods Hollow Road · Madison, WI 53711-5399 USA · Toll Free in USA 800-356-9526 · 608-274-4330 · Fax 608-277-2516 69 www.promega.com TM470 · Revised 2/20 3.G. ‘Settings’ Screen 11658TA Figure 71. The GloMax® Navigator ‘Settings’ screen. Instrument Info Tapping the Instrument Info button reveals a list that includes the software and firmware versions, instrument name and maintenance and calibration values. 13622TA Figure 72. ‘About GloMax® Navigator’ screen located on the Settings menu. This figure shows example information only. Your instrument information may vary. Self Test Each time the instrument is powered “ON”, it automatically performs a self test to check the motion of all axes. This button allows users to manually initiate a self test. 70 Promega Corporation · 2800 Woods Hollow Road · Madison, WI 53711-5399 USA · Toll Free in USA 800-356-9526 · 608-274-4330 · Fax 608-277-2516 TM470 · Revised 2/20 www.promega.com Tools Tools may be accessed from the Tools icon in the menu bar (shown below) or using the Tools button on the ‘Settings’ screen. Figure 73. Accessing Tools. Panel A. Accessing the tools from the menu bar. Panel B. ‘Tools’ screen accessed by pressing the Tools button on the ‘Settings’ screen. Injectors Dual Injectors are an optional accessory for the GloMax® Navigator Instrument. Injector System Specifications Number of Injectors Two Injectors Dispense Volume Range 5–200µl in 1µl increments Injection Speed 20–500µl/second* Waste Collection Tray Volume Approximately 50ml Void Volume 500µl *For standard Luciferase Assay or Dual-Luciferase® Assays, we recommend an injector speed of 200µl per second. Warning: Make sure sufficient volume is available in the well to accept the injected volume, especially when injectors are used within a loop function. Failure to do so may cause an overflow of reagent and/or sample into adjacent wells or into the interior of the instrument. The Injectors may also be accessed from the Tools icon in the menu bar. See Setting Up and Operating the Injector System (Section 4 for more details). 11642TA A. B. ! Promega Corporation · 2800 Woods Hollow Road · Madison, WI 53711-5399 USA · Toll Free in USA 800-356-9526 · 608-274-4330 · Fax 608-277-2516 71 www.promega.com TM470 · Revised 2/20 Recovery Recovery provides the user the ability to manually initialize the instrument axes in case of a severe plate jam. This option is available only from the Settings Tools window. In the event of a plate jam, the instrument will automatically initialize instrument axes itself when either the Door button is selected, a Protocol is started, or if the instrument power is turned Off/On. Initialize all axes by selecting the Start… button in this screen. 13633TA Figure 74. Recovery options. Export Logs The software records all actions performed by the instrument. If users experience error messages, export the log and send it to Promega Technical Services (techserv@promega.com) for troubleshooting. The log file is useful for troubleshooting events. Upon tapping the Export Logs button, a folder browser opens to allow the user to select the location at which logs will be exported (Figure 75). Navigate to the folder location where logs should be exported. The yellow boxes across the top of the screen indicate the currently selected path. Red boxes in the lower portion of the screen represent folders. Once you have selected the desired path, press the Save button to export log files. 11676TA Figure 75. ‘Export Folder’ screen. Select a folder to which logs will be exported. Press Save to export log files. 72 Promega Corporation · 2800 Woods Hollow Road · Madison, WI 53711-5399 USA · Toll Free in USA 800-356-9526 · 608-274-4330 · Fax 608-277-2516 TM470 · Revised 2/20 www.promega.com Administrator The Administrator button is only displayed when users with Administrator-level access to the GloMax® software view the ‘Settings’ screen. Functions available from the Administrator button are discussed in Section 3.H. 3.H. Administrator Settings Administrator settings are only available to users with Administrator-level access to the GloMax® software. These settings allow the administrator to set software Preferences, set an Instrument Name for the GloMax® Instrument, Import Protocols and access software Audit Records. To access administrator settings: 1. From the ‘Home’ screen, tap the Settings button. 2. On the ‘Settings’ screen, tap the Administrator button to open the ‘Administrator Page’ screen (Figure 76). This button is only visible if the current user has Administrator-level access to the GloMax® software. F 11675TA igure 76. ‘Administrator Page’ screen. Preferences The ‘Preferences’ screen is where administrators can specify the file types and paths for the export of results and analyses, define user permissions, configure audible and e-mail alerts, and specify the connection information to Portal software. In addition, the administrator can apply scaling factors to fluorescence and luminescence results if desired. The settings present on each tab are described below. Protocol Settings Tab: On the Protocol Settings tab, the administrator can use the two checkboxes to Allow users to modify protocol details and/or Allow users to modify protocol plate maps. By default, these boxes are checked, allowing users to modify protocol details and plate maps. When unchecked, users will not be able to create or modify protocols or modify protocol plate maps, respectively. Even when users are not provided the permission to modify plate maps, they can import plate map files or retrieve plate maps from Portal software prior to a protocol run. When navigating away from the ‘Preferences’ screen, the administrator will see a prompt to save any changes that have been made. Touch the Save button to save any changes and navigate away from the ‘Preferences’ screen. To leave the ‘Preferences’ screen without saving changes, touch the Don’t Save button. Touch the Cancel button to return to the ‘Preferences’ screen without saving changes. Promega Corporation · 2800 Woods Hollow Road · Madison, WI 53711-5399 USA · Toll Free in USA 800-356-9526 · 608-274-4330 · Fax 608-277-2516 73 www.promega.com TM470 · Revised 2/20 16573TA Figure 77. ‘Protocol Settings’ tab. Export Settings Tab: On the Export Settings tab the administrator can define file formats that should be exported for results files. By default, results will be exported as a comma-delimited text (.csv) and a portable data format (.raw) file. Check the box next to Export to PDF and/or Export to Excel to additionally have results files exported as .pdf and/or .xlsx files. 16583TA Figure 78. ‘Preferences’ screen; ‘Export Settings’ tab. 74 Promega Corporation · 2800 Woods Hollow Road · Madison, WI 53711-5399 USA · Toll Free in USA 800-356-9526 · 608-274-4330 · Fax 608-277-2516 TM470 · Revised 2/20 www.promega.com 3.H. Administrator Settings (continued) Preferences (continued) The administrator can choose the folder path to which results will be manually exported. The administrator also choose whether results are automatically exported after every run and the path to which automatically exported results are saved. Use the Select Folder button underneath Manual Export Folder to open an ‘Export Folder’ browser screen and specify a value other than C:\Exports for manually exported results files (Figure 79). The yellow boxes across the top of the screen indicate the currently selected path. Red boxes in the lower portion of the screen represent folders. Once a folder path is selected, press the Save button to save the new path or Cancel to exit the screen without saving. To have results automatically exported in the specified file formats after every protocol run, check the Auto Export box. If desired, specify an automatic export location by touching the Select Folder underneath Auto Export Folder to open an ‘Export Folder’ browser screen and specify a value other than C:\Exports for automatically exported results files (Figure 79). The yellow boxes across the top of the screen indicate the currently selected path. Red boxes in the lower portion of the screen represent folders. Once a folder path is selected, press the Save button to save the new path or Cancel to exit the screen without saving. When navigating away from the ‘Preferences’ screen, the administrator will see a prompt to save any changes that have been made. Touch the Save button to save any changes and navigate away from the ‘Preferences’ screen. To leave the ‘Preferences’ screen without saving changes, touch the Don’t Save button. Touch the Cancel button to return to the ‘Preferences’ screen without saving changes. 11676TA Figure 79. Specifying Export Folder Path. Use the Select Folder button to specify an export folder path for export files. Promega Corporation · 2800 Woods Hollow Road · Madison, WI 53711-5399 USA · Toll Free in USA 800-356-9526 · 608-274-4330 · Fax 608-277-2516 75 www.promega.com TM470 · Revised 2/20 Analysis Settings On the Analysis Settings tab, the administrator can specify the file formats in which analysis files should be exported and the export folder path for templates and analyses. Use the checkboxes at the top of the screen to specify the file formats in which analysis files should be exported. At least one file format must be selected for analyses to be exported. The administrator can choose one or more of the following: Export to GloMax to export a portable data format (.analysis) file that can be imported into GloMax® software running on another PC, Export to PDF to export analyses as an Adobe PDF (.pdf) file, and Export to Excel to export analyses as a Microsoft Excel® (.xlsx) file. Use the Select Folder button underneath Export Folder to open an ‘Export Folder’ browser screen and specify a value other than C:\Exports for exported template and analysis files (Figure 80). The yellow boxes across the top of the screen indicate the currently selected path. Red boxes in the lower portion of the screen represent folders. Once a folder path is selected, press the Save button to save the new path or Cancel to exit the screen without saving. When navigating away from the ‘Preferences’ screen, the administrator will see a prompt to save any changes that have been made. Touch the Save button to save any changes and navigate away from the ‘Preferences’ screen. To leave the ‘Preferences’ screen without saving changes, touch the Don’t Save button. Touch the Cancel button to return to the ‘Preferences’ screen without saving changes. 16574TA Figure 80. Analysis Settings tab. Specify the file formats for export of analyses and the export folder location for templates and analyses. 76 Promega Corporation · 2800 Woods Hollow Road · Madison, WI 53711-5399 USA · Toll Free in USA 800-356-9526 · 608-274-4330 · Fax 608-277-2516 TM470 · Revised 2/20 www.promega.com 3.H. Administrator Settings (continued) Scaling Factors The Scaling Factors tab allows administrators to apply a scaling multiplier to luminescence data. Scaling factors are provided to offer a way for the data produced by the GloMax® Instrument to more closely match that of other plate readers. Scaling factors of 0.001 to 1000 can be applied to Luminescence data. When navigating away from the ‘Preferences’ screen, the administrator will see a prompt to save any changes that have been made. Touch the Save button to save any changes and navigate away from the ‘Preferences’ screen. To leave the ‘Preferences’ screen without saving changes, touch the Don’t Save button. Touch the Cancel button to return to the ‘Preferences’ screen without saving changes. 16623TA Figure 81. Scaling Factors tab. Administrators can specify a multiplier of 0.001 to 1000 that should be applied to luminescence data produced by the GloMax® Instrument. Promega Corporation · 2800 Woods Hollow Road · Madison, WI 53711-5399 USA · Toll Free in USA 800-356-9526 · 608-274-4330 · Fax 608-277-2516 77 www.promega.com TM470 · Revised 2/20 Alarm Settings The system has the ability to produce audible alerts upon completion of a protocol and/or when encountering an error during a run. Check the boxes on this tab to specify the conditions that would trigger an audible alert. Audible alerts are played through the speaker on the Tablet PC. When navigating away from the ‘Preferences’ screen, the administrator will see a prompt to save any changes that have been made. Touch the Save button to save any changes and navigate away from the ‘Preferences’ screen. To leave the ‘Preferences’ screen without saving changes, touch the Don’t Save button. Touch the Cancel button to return to the ‘Preferences’ screen without saving changes. 16576TA Figure 82. Alarm Settings tab. 78 Promega Corporation · 2800 Woods Hollow Road · Madison, WI 53711-5399 USA · Toll Free in USA 800-356-9526 · 608-274-4330 · Fax 608-277-2516 TM470 · Revised 2/20 www.promega.com E-Mail Settings The E-mail Settings tab on the ‘Preferences’ screen is where e-mail server details are specified and where administrators can determine when and to whom e-mail notifications will be sent. It is necessary to fill out the user and server information on the E-mail Settings tab and ensure the Tablet PC has network access to the e-mail server in order to use e-mail notifications. Required e-mail server information on the left side of the screen include: • User Name: The name of the user for the e-mail account from which e-mail notifications will be sent • E-mail: The e-mail account from which e-mail notifications will be sent • Password: The password for the e-mail account from which e-mail notifications will be sent • SMTP Server: The SMTP server address for the e-mail account • Port: The port that should be used for the SMTP server • SSL Encrypted Connection: Checkbox indicating whether the e-mail account uses an SSL Encrypted connection Note: Contact your IT department to provide the information required to complete e-mail settings. On the right side of the screen the administrator can specify under what conditions and to whom e-mail notifications will be sent. Options include: • Send mail when extraction is completed: Check this box to have e-mails automatically sent to the specified e-mail addresses when an extraction run has been completed. • Send mail on error: Check this box to have e-mails automatically sent to the specified e-mail addresses if an error state occurs during an extraction run. • E-mail Recipients: Enter the e-mail address(es) separated by a space that will act as the distribution list for e-mail notifications under the conditions that have been selected. Upon completing the entries for e-mail settings, you can test the validity of the settings by pressing the Test Connection button. Pressing this button will attempt to send a test e-mail to the e-mail account and e-mail recipients designated by the settings on this page. When navigating away from the ‘Preferences’ screen, the administrator will see a prompt to save any changes that have been made. Touch the Save button to save any changes and navigate away from the ‘Preferences’ screen. To leave the ‘Preferences’ screen without saving changes, touch the Don’t Save button. Touch the Cancel button to return to the ‘Preferences’ screen without saving changes. Promega Corporation · 2800 Woods Hollow Road · Madison, WI 53711-5399 USA · Toll Free in USA 800-356-9526 · 608-274-4330 · Fax 608-277-2516 79 www.promega.com TM470 · Revised 2/20 16577TA Figure 83. E-Mail Settings tab. Portal Settings The ‘Portal’ tab presents settings for use of the Portal software to connect multiple instrument modules for the purposes of sample tracking and data sharing. For example, you may perform a QuantiFluor® dye-based reaction setup using the Maxprep™ Liquid Handler (Cat.# AS9100, AS9101, AS9200 and AS9202) and then transfer the plate map information sample IDs from Portal software into GloMax® Software to quantitate the samples. This allows a seamless sample tracking throughout the workflow, without the need to re-enter sample IDs. Following the GloMax® quantitation of the samples, the concentration results can then be transferred back into Portal software. For more information about Portal Software, please contact Promega Technical Services. Information on the Portal tab will determine whether your system communicates with Portal software and define the server information necessary to connect to Portal software. If you wish to share sample tracking and other method-specific data between multiple modules, check the Enable Portal Sample Tracking checkbox on this tab. In order for your system to communicate with Portal software, enter the following software information: • Server name: Name of the server hosting the Portal software (Default = Computer Name\PromegaPortal) • Database: Name of the SQL database containing Portal information (Default = Portal) • User name: User name necessary to access the Portal software (Default = PortalLogin) • Password: Password necessary to access the Portal software (Default = PortalLogin) 80 Promega Corporation · 2800 Woods Hollow Road · Madison, WI 53711-5399 USA · Toll Free in USA 800-356-9526 · 608-274-4330 · Fax 608-277-2516 TM470 · Revised 2/20 www.promega.com Once the software-specific information has been entered, press the Test Connection button to determine whether the GloMax® Software can successfully connect to the Portal software using the information supplied. A message will be displayed indicating whether the connection was successful. If unsuccessful, confirm that the connection information was correctly entered and try again. When navigating away from the ‘Preferences’ screen, the administrator will see a prompt to save any changes that have been made. Touch the Save button to save any changes and navigate away from the ‘Preferences’ screen. To leave the ‘Preferences’ screen without saving changes, touch the Don’t Save button. Touch the Cancel button to return to the ‘Preferences’ screen without saving changes. 16582TA Figure 84. Portal tab. Instrument Name Enter the desired name of the instrument. This feature is typically used if a laboratory has more than one GloMax® Navigator Instrument. The instrument name will be included in the results files. Note: Changing the instrument name will force a reboot of the Tablet PC. 14241TA Figure 85. Settings Administrator screen Instrument Name. ! Promega Corporation · 2800 Woods Hollow Road · Madison, WI 53711-5399 USA · Toll Free in USA 800-356-9526 · 608-274-4330 · Fax 608-277-2516 81 www.promega.com TM470 · Revised 2/20 Import Protocols Periodically Promega will release new protocols or updated versions of existing protocols to the Promega web site: www.promega.com/resources/tools/detection-instruments-software/promega-branded-instruments/ glomax-navigator/ Download the protocol (.package) file from the web site and save to a USB flash drive, network location, local Tablet PC, etc. From the GloMax® Navigator Software Import Protocols window (SettingsAdministratorImport Protocols), navigate to the folder location and select the file. Select the Drive\ button at the top to view the available drive locations. Then select the specific drive to navigate to the folder of interest. Protocol (.package) files will be shown as blue boxes in the main part of the ‘Select File’ screen. Touch one or more protocol (.package) files to select them, and then press OK to import these files or press Cancel to return to the ‘Administrator Page’ screen without importing files. 11678TA Figure 86. Settings Administrator screen Import Protocols. Audit Records Administrators may view a chronological sequence of actions performed with the GloMax® Navigator System by selecting the Audit Records button within the ‘Administrator Page’ screen. Records can be filtered by time period using buttons on the left side of the screen: Today, This Month, the past 6 Months, This Year, or All. Detailed audit records are automatically generated and stored with the GloMax® Navigator software that cannot be deleted or edited in order to provide technical elements of a part 11 compliant system when used with the appropriate laboratory workflow. Records may be exported by selecting the Export button on the lower left corner of the screen. 82 Promega Corporation · 2800 Woods Hollow Road · Madison, WI 53711-5399 USA · Toll Free in USA 800-356-9526 · 608-274-4330 · Fax 608-277-2516 TM470 · Revised 2/20 www.promega.com 3.H. Administrator Settings (continued) Audit Records (continued) Figure 87. Audit Records screen. Help The context-dependent Help Screen can be accessed from any of the menu screens. F 15154TA igure 88. Help Screen. Promega Corporation · 2800 Woods Hollow Road · Madison, WI 53711-5399 USA · Toll Free in USA 800-356-9526 · 608-274-4330 · Fax 608-277-2516 83 www.promega.com TM470 · Revised 2/20 4. Operating the Injector System (optional) Injectors can be used with basic protocols, as well as with all Kinetic and Loop protocols. Warning: Make sure sufficient volume is available in the well to accept the injected volume. This is especially important for Kinetic and Loop protocols where multiple injection steps may occur. Failure to do so may cause an overflow of reagent and/or sample into adjacent wells or into the interior of the instrument. You can define the injection volume and speed, delay time and integration time for each of the two injectors using the Protocol builder from the ‘Home’ screen. This information is saved with each protocol. The viscosity of solutions/reagents can affect the performance of the injectors. If a protocol requires injectors, the injectors must first be primed with at least 500μl of the reagent to be injected. Priming wets the fluid path and removes air bubbles to ensure delivery of an accurate injection volume for the assay. Priming is also required if an injection protocol has been interrupted for any reason (e.g., power failure). You may need to optimize injection speed, depending on the solution/reagent you are working with. We recommend using the default settings of 200µl per second as a starting point. From the Tools icon in the menu bar, or accessed from the Tools button on the ‘Settings’ screen (Figure 73, Panel B), follow the guided instructions to Prime, Reverse Purge and Flush the injectors. 11684TA Figure 89. Injector functions (prime, reverse purge and flush). After finishing an assay, unused reagent in the fluid path can be retrieved. Select the option to Reverse Purge by tapping the Start… button on the ‘Injectors’ screen. To prevent clogging of the fluid lines, flush after each use. Note: The reagent bottle holder can accommodate four sizes of containers: a round flat-bottom bottle, a 50ml conical tube, a 15ml conical tube and a 15ml test tube. ! 84 Promega Corporation · 2800 Woods Hollow Road · Madison, WI 53711-5399 USA · Toll Free in USA 800-356-9526 · 608-274-4330 · Fax 608-277-2516 TM470 · Revised 2/20 www.promega.com 4.A. Priming Injectors 1. Place the reagent container (tube or bottle) into the reagent holder. 2. Cover the bottle opening with Parafilm® to prevent reagent evaporation. 3. Insert the injector tube through the Parafilm® and into the reagent bottle. 4. Ensure the Waste Collection Tray is in position and empty. 5. Tap the Prime button shown in Figure 89. 13626TA Figure 90. Injector prime function. 6. Indicate the injector to prime. Set the volume. Note: The minimum volume needed to prime is 500µl. 7. Tap the Start Prime button (Figure 90). 8. After priming is complete, empty the Waste Collection Tray. Once the injectors are primed, they are ready for use according to the programmed protocol. Promega Corporation · 2800 Woods Hollow Road · Madison, WI 53711-5399 USA · Toll Free in USA 800-356-9526 · 608-274-4330 · Fax 608-277-2516 85 www.promega.com TM470 · Revised 2/20 4.B. Reverse Purge (Retrieving Unused Reagents from Injectors, optional) 1. Tap the Reverse Purge button on the Injectors screen (Figure 89). 13627TA Figure 91. Reverse Purge function. 2. Ensure the Waste Collection Tray is in position and empty. 3. Tap the Start Reverse Purge button (Figure 91). 4. Any reagents left in the fluid lines will be returned to the reagent container. 4.C. Flushing the Injectors after Use 1. Remove the sample plate from the instrument. 2. Tap the Flush button on the ‘Injectors’ screen (Figure 89). 13628TA Figure 92. Injector Flush function. 3. Ensure the Waste Collection Tray is in position and empty. 4. Tap the Start Flush button (Figure 92). The recommended flush protocol uses a sequence of 1 cycle (1ml) of deionized water, 1 cycle (1ml) of 70% ethanol, 1ml of deionized water and then 1 cycle (1ml) of air to flush the fluid. Note: Empty Waste Collection Tray when priming and flushing are complete. See Section 5.F for injector cleaning instructions. 86 Promega Corporation · 2800 Woods Hollow Road · Madison, WI 53711-5399 USA · Toll Free in USA 800-356-9526 · 608-274-4330 · Fax 608-277-2516 TM470 · Revised 2/20 www.promega.com 5. Cleaning and Maintenance 5.A. General Instrument Care If a well is overfilled, immediately clean up any spills. To gain access to the inside of the instrument, manually open the door. 5.B. General Cleaning Turn off the GloMax® Navigator System and disconnect the AC Power Adapter whenever the interior of the instrument is open for cleaning and maintenance. Residue accumulated from various reagents may inhibit proper movement of the Aperture cross talk mask. Immediately clean up any spills. We recommend thoroughly cleaning the interior of the instrument every 30 days as follows: Do not allow excess solution to run off onto other electrical components, because this may cause damage to the instrument and its electronics. Do not use solvents or abrasive cleaners. Use a cloth dampened with deionized water to periodically wipe clean the exterior of the GloMax® Navigator Instrument. Do not use solvents or abrasive cleaners. Warning: If a fluid spill on the detector is suspected, immediately contact Promega Technical Services for cleaning instructions. 5.C. Tablet PC Care Do not use a sharp object, such as a pen, pencil, or marker to make contact with the touch screen. Sharp objects may damage or leave a permanent mark on the LCD screen. Do not spill liquid on the screen. To clean the Tablet PC, turn off the power. The touchscreen has been coated to make it easier to clean. You don’t need to rub hard to remove fingerprints or oily spots. To avoid scratches, use a soft, lint-free cloth to gently wipe the screen. You can dampen the cloth with water or an eyeglass cleaner, but don’t apply liquids directly to the Tablet PC. Don’t use window cleaner or other chemical cleaners on the Tablet PC. ! Promega Corporation · 2800 Woods Hollow Road · Madison, WI 53711-5399 USA · Toll Free in USA 800-356-9526 · 608-274-4330 · Fax 608-277-2516 87 www.promega.com TM470 · Revised 2/20 5.D. Cleaning the Optical Head 1. Turn OFF the instrument. Disconnect the AC Power Adaptor. Do not attempt to clean the Optical Head while the instrument is ON. 2. Push the Microplate Sample Tray to the back of the instrument and push the Optical Head from the Home position toward the center of the instrument (Figure 93). Fi 13542TC Optical head Microplate sample tray and cover gure 93. Interior of the GloMax® Navigator instrument. 3. Loosen the hand screws and remove the Injector Tip Holder from the Optical Head. Facing the front of the instrument, push upward and then leftward (as viewed from the bottom of the Tip Holder to release the Tip Holder from the Optical Head (Figure 94). Completely remove the Injector Tip Holder to take out the Aperture. Figure 94. Remove the Injector Tip Holder. 88 Promega Corporation · 2800 Woods Hollow Road · Madison, WI 53711-5399 USA · Toll Free in USA 800-356-9526 · 608-274-4330 · Fax 608-277-2516 TM470 · Revised 2/20 www.promega.com 5.D. Cleaning the Optical Head (continued) 4. Place your hand underneath the Optical Head. Grasp the Aperture and pull it toward you (Figure 95). Note: Do not touch the bottom surface of the Optical Head. Figure 95. Remove the Aperture. 5. Soak the Injector Tip Holder and the Aperture in a 70% ethanol solution for 30 minutes to dissolve reagent residue. Rinse with deionized water. 6. Allow the Injector Tip Holder and Aperture to air dry completely before proceeding. Alternatively, blot dry with a lint-free, Kimwipes® tissue. 7. Return the Aperture to the Optical Head. Align the Aperture with the Optical Head and gently guide the Aperture onto the Optical Head (Figure 96). Figure 96. Replace the Aperture. Promega Corporation · 2800 Woods Hollow Road · Madison, WI 53711-5399 USA · Toll Free in USA 800-356-9526 · 608-274-4330 · Fax 608-277-2516 89 www.promega.com TM470 · Revised 2/20 8. Return the Injector Tip Holder to the Optical Head and tighten the hand screws. Position the holder just above the front pins on the Optical Head. Push the holder toward the right to lock the holder securely to the right pin of the Optical Head. Then push down and lock the holder on the left pin (Figure 97). Figure 97. Replace the Injector Tip Holder. 9. Return the Optical Head to the Home position by pushing the Optical Head from the center of the instrument all the way to the right side of the instrument (Figure 93). 10. Pull the Microplate Sample Tray forward to the Home position. 11. Reconnect the AC Power Adaptor to the instrument. Turn ON the instrument. 5.E. Cleaning the Instrument Interior Accumulated residue from various luminescent substrates may inhibit proper movement of the Optical Head. Failure to properly maintain a clean interior may cause a mechanical error and the irretrievable loss of data. We recommend thoroughly cleaning the interior every 30 days. 1. Turn OFF the instrument 2. Use a Kimwipes® tissue dampened with 70% ethanol to wipe the Microplate Sample Tray cover. Repeat. 3. Push the Microplate Sample Tray to the back of the instrument, exposing two steel guide rails upon which the sample tray glides (Figure 93). Use a Kimwipes® tissue dampened with 70% ethanol to clean the guide rails. 4. Push the Optical Head to the center of the instrument, exposing the black metal shelf on the right side of the instrument (Figure 94). 5. Clean the black shelf with a fresh Kimwipes® tissue dampened with 70% ethanol. Be sure to clean the home position for the optical head. 6. Close the instrument door and turn the instrument ON. The instrument will then return to the Home position and is ready to use. 90 Promega Corporation · 2800 Woods Hollow Road · Madison, WI 53711-5399 USA · Toll Free in USA 800-356-9526 · 608-274-4330 · Fax 608-277-2516 TM470 · Revised 2/20 www.promega.com 5.F. Cleaning the Injectors We recommend thoroughly cleaning the injectors every 30 days. 1. Use a prepared solution of 70% ethanol to flush the injector(s) three times. Prepare at least 10ml of ethanol for each injector to be flushed. 2. Place the container of 70% ethanol into the bottle holder. The inlet tube should be inserted so that it reaches the bottom of the container. 3. Ensure the Waste Collection Tray is in position and empty. 4. From the ‘Tools’ screen, select Injector. Tap the Prime button to initiate priming. 5. Allow the solution to sit in the fluid path for 30 minutes before flushing the injectors. 6. From the ‘Tools’ screen, select Injector. Tap the Flush button to show the ‘Flush’ screen. 7. Select 9 flush cycles and press Start Flush to wash the lines with 70% ethanol. 8. Empty and clean the Waste Collection Tray, and place it back into position. 9. Place a container of deionized water on the bottle holder with the inlet tube inserted to reach the bottom of the container. Prepare at least 10ml of deionized water for each injector to be flushed. 10. From the ‘Tools’ screen, select Injector. Tap the Flush button to initiate flushing. 11. Select 9 flush cycles, and press Start Flush to wash the lines with deionized water. 12. Empty and clean the Waste Collection Tray, and place it back into position. 13. Flush the injector 3 times with air. A small volume of water will remain in the injector after the air purge. 5.G. Cleaning the Waste Collection Tray The maximum volume capacity of the Waste Collection Tray is approximately 50ml. Carefully remove the Waste Collection Tray from its position to avoid liquid spills. After each prime and flush sequence, discard any fluid from the Waste Collection Tray, and rinse it with deionized water. 5.H. Removing or Replacing Inlet and Outlet Tubing Replacement tubing assembly is available. See Section 7.E for ordering information. 1. Turn OFF the instrument. Disconnect the AC Power Adaptor. 2. Push the Microplate Sample Tray to the back of the instrument and push the Optical Head from the Home position toward the center of the instrument (Figure 93). Promega Corporation · 2800 Woods Hollow Road · Madison, WI 53711-5399 USA · Toll Free in USA 800-356-9526 · 608-274-4330 · Fax 608-277-2516 91 www.promega.com TM470 · Revised 2/20 3. Loosen the hand screws and remove the Injector Tips and Injector Tip Holder from the Optical Head. Facing the front of the instrument, push upward and then leftward (as viewed from the bottom of the Tip Holder to release the Tip Holder from the Optical Head (Figure 94). 4. Remove the Injector Tubing from the Injector Tip Holder. 5. Disconnect the inlet or outlet tubing from the injector port by twisting the gray fitting counterclockwise. 6. Discard the used injector tubing. 7. Twist the fitting of the replacement tubing into the correct port of the injector pump. Note: The inlet and outlet tubing have different lengths. Tubing with one colored band is inlet tubing (Injector 1 is red; Injector 2 is yellow). Tubing with two colored bands is outlet tubing (Injector 1 is red; Injector 2 is yellow). 8. Insert the free end of the injector tubing into the Injector Tip Holder until the tip of the tubing has pushed through the red holder and stops. 9. Return the Injector Tip Holder to the Optical Head and tighten the hand screws. Position the holder just above the front pins on the Optical Head. Push the holder toward the right to lock the holder securely to the right pin of the Optical Head. Then push down and lock the holder on the left pin (Figure 97). 10. Insert the Injector Tips into the Injector Tip Holder. Snap the Injector Tips into place. 11. Return the Optical Head to the Home position by pushing the Optical Head from the center of the instrument all the way to the right side of the instrument (Figure 93). 12. Pull the Microplate Sample Tray forward to the Home position. 13. Reconnect the AC Power Adaptor to the instrument. Turn ON the instrument. 5.I. Additional Maintenance Periodically wipe off the outside of the instrument with a damp cloth. Do not use solvents or abrasive cleaners to clean the instrument. Avoid spilling liquids into the Microplate Sample Tray. If a spill has occurred: 1. Turn OFF the instrument. Disconnect the AC Power Adaptor. 2. Wipe up any moisture inside the Microplate Sample Tray. 3. Use Kimwipes® tissue dampened with 70% ethanol to clean the Microplate Sample Tray. 4. Allow the instrument to completely dry before using. 5. Connect the AC Power Adaptor and turn ON the instrument. Note: If you suspect fluids have spilled onto the light detector, please contact Promega Technical Services for cleaning instructions. 92 Promega Corporation · 2800 Woods Hollow Road · Madison, WI 53711-5399 USA · Toll Free in USA 800-356-9526 · 608-274-4330 · Fax 608-277-2516 TM470 · Revised 2/20 www.promega.com 6. Troubleshooting For questions not addressed here, please contact your local Promega Branch Office or Distributor. Contact information available at: www.promega.com. E-mail: techserv@promega.com 6.A. Error Messages Error Message Description Resolution Start Problem Invalid Value: Selection must be non-empty Select at least one well on the plate map. Protocol Validation: No plate detected in instrument Make sure the 96-well plate was inserted and is properly seated. Error: Cannot connect to the instrument. Device is not found; is it turned off or disconnected? Tablet PC is not connected to the instrument, Tablet PC is OFF or Instrument is OFF. Check to see if the Tablet PC is connected to the instrument or turn ON the Tablet PC or turn ON the instrument. If the error persists, contact Promega Technical Services. Open door detected during operation The door of the instrument has been opened unexpectedly during operation of the instrument. Manually opening the door of the instrument during an instrument operation will cause that operation to be aborted. Reference position loss See Reference position loss (Underrun) See Reference position loss (Underrun) Reference position loss (Underrun) During an instrument operation the tray mechanism has not been able to move to the desired position. This may be caused by an obstruction in the instrument. Attempt to remove the obstruction manually if possible. Press Eject, press Self Test on the ‘Settings’ screen or press Recovery in the Tools menu. Any of these methods should result in recovery of the obstructing item. Contact Promega Technical Services if it is not possible to resolve the issue. Firmware read operation timeout The instrument has failed to respond to a command. Attempt to repeat the operation if possible. If this error recurs please contact Promega Technical Services to help troubleshoot the issue. Firmware write operation timeout The instrument has failed to write values to its firmware. Attempt to repeat the operation if possible. If this error recurs please contact Promega Technical Services to help troubleshoot the issue. Promega Corporation · 2800 Woods Hollow Road · Madison, WI 53711-5399 USA · Toll Free in USA 800-356-9526 · 608-274-4330 · Fax 608-277-2516 93 www.promega.com TM470 · Revised 2/20 Error Message Description Resolution FPGA corrupt FPGA image programming has failed, or FPGA module is defective. Please contact Promega Technical Services for troubleshooting assistance. ADC status invalid Internal hardware failure has occurred. Please contact Promega Technical Services for troubleshooting assistance. Head loopback failure Internal hardware failure has occurred. Please contact Promega Technical Services for troubleshooting assistance. No plate in instrument No plate is present or a clear plate is in the Sample Tray. Use an opaque white or black plate. Multiple groups are not supported Attempting to analyze multiple experimental data sets in an analysis run. Exclude all but a single experimental data set and re-run the analysis. Linear curve fit requires at least two curve points Attempting to analyze a linear curve or linear standard curve with fewer than two known curve points Specify more standard curve points in the analysis so at least two concentrations are present in the standard curve Dose Response curve fit requires at least four curve points Attempting to analyze a dose response curve with fewer than four concentration points Specify at least four curve points in the analysis with independent concentrations. 6.B. Common Problems Symptoms Causes and Comments Injectors sputter or drip Reagent buildup in injector lines. Run the flushing protocol (Section 4.C). Injector speed may not be optimal for the viscosity or composition of the solutions used. Injectors not injecting No reagent in injector lines. Confirm that the inlet tubing is inserted into the bottom of the reagent container. Reprime the injectors. (Section 4.A). Injector tubing is clogged and may need to be replaced. (Section 5.F). Plate not detected The Microplate Sample Tray does not contain a plate or waste tray, as appropriate. Insert a plate tray or waste tray, as needed. 94 Promega Corporation · 2800 Woods Hollow Road · Madison, WI 53711-5399 USA · Toll Free in USA 800-356-9526 · 608-274-4330 · Fax 608-277-2516 TM470 · Revised 2/20 www.promega.com 6.B. Common Problems (continued) Symptoms Causes and Comments Plate stuck or jammed in instrument Press Eject, press Self Test on the ‘Settings’ screen or press Recovery in the Tools menu (Section 3.G). Any of these methods can be used to attempt to recover the plate. If the issue is not resolved, contact Promega Technical Services (techserv@promega.com). Tablet PC touch screen does not 1. Verify the plug is securely connected to the Tablet PC. appear to be working 2. Verify that the instrument is plugged into the USB port on the Tablet PC. 3. Restart the Tablet PC, and launch the GloMax® Navigator software. 4. If the issue is not resolved, contact Promega Technical Services (techserv@promega.com). Unable to modify methods or plate maps Administrators can restrict users from modifying userdefined methods and plate maps. Check with your site administrator to check whether user permissions have been restricted. Power failure during run In the event of a power failure, turn OFF the instrument and the Tablet PC. When power is resumed, turn the instrument and Tablet PC back ON. The results that were generated during the run (before the power failure) will be saved. Instrument problem: “door opened” 1. Instrument door was opened during a run, message: explanation causing the reading to abort. Restart the run. 2. Something prevented the instrument door from fully closing. Check the instrument door for any obstructions. 3. The door sensor may be bent or broken. Contact Promega Technical Services. Luminescent signal is reported as SAT The luminescent output of the sample is saturating the detector. 1. Use less sample. 2. Use a black plate. Low luminescent signal Low activity in sample. Use white opaque plates. High luminescent cross talk Use high-quality white or black opaque plate. Injector leaks The inlet or outlet tubing is not properly connected to the injector pump. See Section 5.H for instructions on removing and replacing tubing. Promega Corporation · 2800 Woods Hollow Road · Madison, WI 53711-5399 USA · Toll Free in USA 800-356-9526 · 608-274-4330 · Fax 608-277-2516 95 www.promega.com TM470 · Revised 2/20 Symptoms Causes and Comments Injectors do not sit properly in the Reagent residue has built up inside the Injector Tip Injector Tip Holder Holder. See Section 5.D for instructions on cleaning the Optical Head. Communication failure with Portal software In the event of a communication failure with the Portal software, no reports can be generated. If a PC is hosting the Portal software, make sure the PC is on and connected to the network. Contact your IT department to determine whether a network outage or communication failure has occurred. Grinding noise during run Reagent residue has built up on the Aperture. See Section 5.E for instructions on cleaning the interior of the instrument. The Microplate Sample Tray cover is open during the run. Close the tray cover and secure with the tray latch. The plate holder should be in the Home position. The Microplate Sample Tray cover does not close The 96-well plate is not sitting flat in the Microplate Sample Tray. Gently push the tray cover up to a 90 degree angle with the Microplate Sample Tray to completely open the tray. Place the 96-well plate inside the tray. Remove lid from 96-well plate, place inside the Microplate Sample Tray and close the tray cover. Moisture appears on top of the Microplate Sample The injector tips are bent. See Sections 5.D and 5.I for Tray cover after a run. instructions to change the tubing and clean the Optical Head. Injector tip holder is not seated correctly. Injector speed is not set correctly, causing reagent drips. The 96-well plate has overflowed inside instrument. • See Section 5.D for instructions to clean the Optical Head. • Check the wells selected for injection and measurement. • Check the total injection volume in the software protocol. • Check the volume of sample inside the well. The maximum volume per well is 300µl. • Thoroughly clean the interior of the instrument. Reagent has spilled inside the instrument Wipe up spills immediately using an absorbent paper towel or Kimwipes® tissue. If necessary, use a 70% ethanol solution to remove reagent residue. 96 Promega Corporation · 2800 Woods Hollow Road · Madison, WI 53711-5399 USA · Toll Free in USA 800-356-9526 · 608-274-4330 · Fax 608-277-2516 TM470 · Revised 2/20 www.promega.com 6.C. Use of a USB Flash Drive • Insert a USB flash drive into one of the two USB ports on the back of the instrument before running any protocol and do not remove until the protocol is finished. • Do not insert or remove USB flash drive while instrument is running. • Because USB flash drives may vary from vendor to vendor or from type to type, incompatibilities may occur. If the USB flash drive is not detected after a few seconds or if you encounter any issues with the USB flash drive, shut down and restart the Tablet PC and the instrument, and try a different brand of USB flash drive. • If the Tablet PC becomes unresponsive after inserting a USB flash drive, shut down the Tablet PC and instrument, remove the USB flash drive, and restart the Tablet PC and the instrument. Promega Corporation · 2800 Woods Hollow Road · Madison, WI 53711-5399 USA · Toll Free in USA 800-356-9526 · 608-274-4330 · Fax 608-277-2516 97 www.promega.com TM470 · Revised 2/20 7. Appendix 7.A. Configuring the Tablet PC The GloMax® Navigator Tablet PC touch screen allows the user to adjust various operating system configurations and user settings as described below. Your IT department or site Administrator should configure the Tablet PC according to the IT rules and IT procedures pertinent to your institution. The following is a set of guidelines for your IT personnel or site Administrator. Depending on your institution’s IT policy, you may or may not be able to configure/change the settings for the Tablet PC. The Tablet is pre-installed with a Microsoft Excel® reader, but you may install the full version of Microsoft Office if you desire. We do not recommend loading other programs onto the Tablet because these may interfere with the instrument operation. Note: Some institutions require anti-virus software installed on PCs within the institution. If installing an antivirus program please ensure it is set to manual, not automatic, update. Antivirus software will slow the performance of the Tablet PC and will affect the performance of the GloMax® Instrument while it is measuring samples. Additional recommendations if using your own PC: • Disable automatic Windows® updates and virus scans • Disable automatic power off, sleep, or hibernation settings • Disable “Fast Startup”. Set the power button to Shut Down not Sleep. • Disable any other automatically or manually started software that would consume PC resources during operation. • Ensure there are no domain policies that would overwrite any of the above settings. • Ensure that Windows® will not turn off USB ports to save power. Notes: 1. The Tablet PC that is provided with GloMax® System has already been configured for the settings listed above. 2. Ensure the User and Administrator groups are configured properly if adding the Tablet PC to your local domain (see 3. User Password and Setup). Failure to configure the User and Groups on the Tablet PC will prevent use of the GloMax® Navigator software. The first time you use the GloMax® Instrument and Tablet PC, you should check the configuration of the following options. Settings can be changed later if required by following the instructions again. ! ! 98 Promega Corporation · 2800 Woods Hollow Road · Madison, WI 53711-5399 USA · Toll Free in USA 800-356-9526 · 608-274-4330 · Fax 608-277-2516 TM470 · Revised 2/20 www.promega.com 1. Touch Screen The GloMax® Tablet PC has a touch screen that can be used to navigate to the various screens. Touching and holding an icon on the Tablet for 3 seconds is equivalent to a Right Click on a normal PC. 2. Date and Time The date and time set on the Tablet PC are used for the instrument run log to indicate when a protocol was run on the GloMax® Instrument, as well as during kinetic runs to mark the time during each read. For Windows® 8: a. Select the Windows® 8 Settings icon by swiping in from the right screen edge. Select Control Panel (or type “control panel” in the Search tool if you do not see Control Panel). b. On the ‘Control Panel’ screen, tap the Date and Time menu item. Note: If you are unable to see the Date and Time menu item, tap Category View in the upper right corner of the window and choose either Large or Small icons. c. First set your time zone by tapping the Change Time Zone button. d. On the ‘Time Zone Settings’ screen, select the appropriate time zone for your location and whether you wish the clock to automatically adjust for Daylight Savings Time. e. Tap the OK button to save the time zone settings. f. You will be returned to the ‘Date and Time Settings’ screen. g. On the ‘Date and Time Settings’ screen, tap the Change Date and Time button. h. Set the appropriate date and time for your current location using the calendar and clock setting icons. i. Tap the OK button to save the date and time settings. j. You will be returned to the ‘Date and Time Settings’ screen. Tap the OK button on this screen to return to the Control Panel. k. Close the ‘Control Panel’ screen by tapping the red X button in the upper right corner of the screen. For Windows® 10: a. Close the GloMax® Software if it is open. If not at the ‘Home’ screen, touch the Home button in the upper left corner of the user interface. Touch the X in the upper left corner of the screen and then confirm that you want to exit. b. From the ‘Desktop’ screen, touch the Start button on the left side of the Taskbar. Touch the Settings button to open the ‘Windows Settings’ screen (Figure 98). Promega Corporation · 2800 Woods Hollow Road · Madison, WI 53711-5399 USA · Toll Free in USA 800-356-9526 · 608-274-4330 · Fax 608-277-2516 99 www.promega.com TM470 · Revised 2/20 F 13912TA igure 98. The ‘Windows Settings’ screen. The ‘Windows Settings’ screen provides access to multiple functions that can be used to configure options and settings for the Tablet PC. c. Touch the Time & language button on the ‘Windows Settings’ screen to open the ‘Time & language’ screen (Figure 99). F 13913TA igure 99. ‘Time & language’ screen. Settings for Date and time can be modified from this screen. d. The ‘Date and time’ screen displays the current date, time, time zone, and daylight saving time settings on the Tablet PC. Check to see whether these match the current date, time, time zone and daylight saving time for your location. 100 Promega Corporation · 2800 Woods Hollow Road · Madison, WI 53711-5399 USA · Toll Free in USA 800-356-9526 · 608-274-4330 · Fax 608-277-2516 TM470 · Revised 2/20 www.promega.com Changing the Time Zone and Daylight Saving Time Settings e. Use the drop-down menu under the Time Zone heading to select the time zone appropriate for your location. f. Below the drop-down box for setting the time zone is the Adjust for daylight saving time automatically switch. Make sure this switch is in the on position if your location observes daylight savings time during the summer hours. Otherwise make sure the switch is in the off position. Setting Date and Time g. If the date and time shown on the ‘Time & language’ screen still does not accurately reflect the date and time in your location, touch the Change button below the Change date and time. h. On the ‘Change date and time’ screen (Figure 100), use the drop-down boxes to select the appropriate date and time for your location. F 13914TA igure 100. Adjusting date and time. Use the drop-down menus on the ‘Change date and time’ screen to adjust the displayed date and time on the Tablet PC. i. Once you are satisfied with the date and time settings, touch the Change button to save the date and time settings. If you wish to discard your changes, touch the Cancel button. j. You will be returned to the ‘Date and time’ window. Touch the X button in the upper right corner of the screen to return to the ‘Desktop’ screen. Promega Corporation · 2800 Woods Hollow Road · Madison, WI 53711-5399 USA · Toll Free in USA 800-356-9526 · 608-274-4330 · Fax 608-277-2516 101 www.promega.com TM470 · Revised 2/20 7.A. Configuring the Tablet PC (continued) 3. User Password and Setup GloMax® Software supports the following user roles. PromegaAdministrator: Promega Administrators have the following capabilities: • All PromegaUser capabilities • Import protocols • Select Export folders • Modify plate maps • Create and modify protocols • Specify software settings and preferences • Set Instrument Name • Export Audit Records PromegaUser: Promega Users have the following capabilities: • Select and run preloaded protocols • Create and modify user-defined protocols (if allowed by administrator) • Modify plate maps (if allowed by administrator) • View, export results Assigning User Accounts to Promega Groups The GloMax® Software employs the Windows® login user access levels as a security tool for adding approved users and associated passwords. New user accounts should be created based on policies governing your institution. Only someone with an Administrator account can assign users to Promega groups. You must close the GloMax® Software to create user accounts. 1. Follow the instructions for your Tablet PC operating system. For Windows® 8: Swipe in from the right edge of the screen and select Search, then type in “lusrmgr.msc” and press Enter. The Local Users and Groups item should appear. For Windows® 10: a. Close the GloMax® Software if it is open. If not at the ‘Home’ screen, touch the Home button in the upper left corner of the user interface. Touch the X in the upper left corner of the screen and then confirm that you want to exit. b. Touch the Search icon on the left side of the Taskbar. 102 Promega Corporation · 2800 Woods Hollow Road · Madison, WI 53711-5399 USA · Toll Free in USA 800-356-9526 · 608-274-4330 · Fax 608-277-2516 TM470 · Revised 2/20 www.promega.com c. Touch the ‘Search’ text box, then touch the Keyboard icon on the on the right side of the Taskbar to open the on-screen keyboard and enter the text lusrmgr.msc (Figure 101, Panel A). Touch the X on the on-screen keyboard to close the keyboard. Under the Best match header, an item called lusrmgr.msc should appear. Touch this item to open the ‘Local Users and Groups (Local)’ screen (Figure 101, Panel B). 13932TA A. B. Figure 101. Accessing Users and Groups. Panel A. Touch the Search button in the taskbar and enter lusrmgr.msc into the search window to bring up the lusrmgr.msc item. Panel B. Touching the lusrmgr.msc item from the search list opens the ‘Local Users and Groups (Local)’ screen. 2. In the left pane of the ‘Computer Management’ screen, select Local Users and Groups and double-tap Groups. Note: If the Local Users and Groups menu item is not visible, select the System Tools item to expand that menu heading. Figure 102. Selecting Groups from the Computer Management screen. Promega Corporation · 2800 Woods Hollow Road · Madison, WI 53711-5399 USA · Toll Free in USA 800-356-9526 · 608-274-4330 · Fax 608-277-2516 103 www.promega.com TM470 · Revised 2/20 3. If you want to add Administrators, double-tap PromegaAdministrators. A ‘PromegaAdministrator’ window will open, which can be used to add existing users to the PromegaAdministrators group. Tap the Add… button to add users to the PromegaAdministrators group. In the “Enter the object names to select” area of the window enter the username of the user you wish to add to this group. Tap OK on this window and tap OK on the ‘PromegaAdministrator Properties’ screen to add users to the PromegaAdministrators group. Close the ‘Computer Management’ screen. Figure 103. Adding users to the PromegaAdministrators group. 4. If you want to add users, tap PromegaUsers. A ‘PromegaUsers’ screen will open, which can be used to add existing users to the PromegaUsers group. Tap the Add… button to add users to the PromegaUsers group. In the “Enter the object names to select” area of the window enter the username of the user you wish to add to this group. Tap OK on this window, and tap OK on the ‘PromegaUsers Properties’ screen to add users to the PromegaUsers group. Close the ‘Computer Management’ screen. Figure 104. Adding users to the PromegaUsers group. 104 Promega Corporation · 2800 Woods Hollow Road · Madison, WI 53711-5399 USA · Toll Free in USA 800-356-9526 · 608-274-4330 · Fax 608-277-2516 TM470 · Revised 2/20 www.promega.com Removing User Accounts The GloMax® Software employs the Windows® login user access levels as a security tool for adding approved users and associated passwords. Removing existing users can only be performed by someone with Administrator privileges. 1. Follow the instructions for your Tablet PC operating system. For Windows® 8: Swipe in from the right edge of the screen and select Search, then type in “lusrmgr.msc” and press Enter. The Local Users and Groups item should appear. For Windows® 10: a. Close the GloMax® Software if it is open. If not at the ‘Home’ screen, touch the Home button in the upper left corner of the user interface. Touch the X in the upper left corner of the screen and then confirm that you want to exit. b. Touch the Search icon on the left side of the Taskbar. c. Touch the ‘Search’ text box, then touch the Keyboard icon on the on the right side of the Taskbar to open the on-screen keyboard and enter the text lusrmgr.msc (Figure 105, Panel A). Touch the X on the on-screen keyboard to close the keyboard. Under the Best match header, an item called lusrmgr.msc should appear. Touch this item to open the ‘Local Users and Groups (Local)’ screen (Figure 105, Panel B). 13932TA A. B. Figure 105. Accessing Users and Groups. Panel A. Touch the Search button in the taskbar and enter lusrmgr.msc into the search window to bring up the lusrmgr.msc item. Panel B. Touching the lusrmgr.msc item from the search list opens the ‘Local Users and Groups (Local)’ screen. 2. Tap Local Users and Groups and double-tap Groups. 3. If you want to remove Administrators, tap PromegaAdministrators. A ‘PromegaAdministrator’ screen will open, which can be used to remove existing users from the PromegaAdministrators group. Promega Corporation · 2800 Woods Hollow Road · Madison, WI 53711-5399 USA · Toll Free in USA 800-356-9526 · 608-274-4330 · Fax 608-277-2516 105 www.promega.com TM470 · Revised 2/20 7.A. Configuring the Tablet PC (continued) 3. User Password and Setup (continued) Removing User Accounts (continued) 4. Select the user you want to remove and tap the Remove… button. Tap OK to remove selected user from the PromegaAdministrators group. Close the ‘Computer Management’ screen. 5. If you want to remove users, tap PromegaUsers. A ‘PromegaUsers’ screen will open, which can be used to remove users from the PromegaUsers group. Select the user to be removed and tap the Remove… button Touch OK to remove the selected user from the PromegaUsers group. Set Instrument Name (GloMax® Software) Administrators can set the instrument name using the GloMax® Software by tapping the Instrument Name button from the ‘Administrator Page’ screen (Figure 106, Home Settings Administrator). Administrators can use the on-screen keyboard to manually enter the instrument name (Figure 107). The instrument name should be entered following the procedures and rules at your site. Note: Changing the instrument name will force a reboot of the Tablet PC. 11675TA Figure 106. GloMax® Software ‘Administrator Page’ screen. 14241TA Figure 107. ‘Instrument Name’ screen. Administrators can manually enter the instrument name from the ‘Instrument Name’ screen. ! 106 Promega Corporation · 2800 Woods Hollow Road · Madison, WI 53711-5399 USA · Toll Free in USA 800-356-9526 · 608-274-4330 · Fax 608-277-2516 TM470 · Revised 2/20 www.promega.com 7.B. Icons and Symbols Home screen 11609TA Exit Software 11611TA Quick access to the Tools Screen 13629TA Home all axes 13630TA Help Screen From any screen other than the Home screen 11614TA Home. Pressing this icon will take you to the Home Screen. Protocol screen 11615TA Favorite. Mark to select a favorite protocol, which will then sort to the top of the page. 11616TA Yellow favorite indicates selection. Protocol Editor screen 11617TA Plate map is locked and applied to every step within the protocol 11618TA Plate map is unlocked, and each step of the protocol may have a different plate map selection. 11619TA Plate map 11620TA Attention, there is an error in the protocol. Touch this icon for information. Results screen 11622TA Press to turn the heat map display “on” or “off. 11621TA Delete a result file from the Results Screen. Promega Corporation · 2800 Woods Hollow Road · Madison, WI 53711-5399 USA · Toll Free in USA 800-356-9526 · 608-274-4330 · Fax 608-277-2516 107 www.promega.com TM470 · Revised 2/20 7.C. Warranty and Service The GloMax® System comes with a one-year warranty from Promega. Additional warranty and service agreements are available. For more information, contact Promega Technical Services. Contact information is available at: www.promega.com. E-mail: techserv@promega.com To obtain service during the warranty period, please take the following steps: 1. Contact Promega Technical Services. 2. Carry out minor adjustments or tests as suggested by your Technical Services contact. 3. If it is determined that the instrument should be returned for repair, Promega Technical Services will arrange for service by an authorized GloMax® Service Agent. You will be issued a Promega return authorization number. YOU MUST OBTAIN a Promega return authorization number (RMA number) before returning an instrument for service. 4. Before returning the instrument, you will be responsible for cleaning it and providing a Certificate of Decontamination (see Section 7.D). If the instrument has been exposed to any chemical, biological or radioactive hazards, contact Promega Technical Services for decontamination instructions before shipping. 108 Promega Corporation · 2800 Woods Hollow Road · Madison, WI 53711-5399 USA · Toll Free in USA 800-356-9526 · 608-274-4330 · Fax 608-277-2516 TM470 · Revised 2/20 www.promega.com 7.D. Certificate of Decontamination Disinfection and decontamination are required before shipping the instrument and instrument accessories for repair. Instruments returned for service must be accompanied by a signed and dated Certificate of Decontamination, which must be attached to the outside packaging of the instrument. Print this page, fill out, sign and return along with the instrument for repair. 1 Clean the interior of the instrument according to the instructions in Section 5.E. 2. Clean the injectors according to the instructions in Section 5.F. 3. Clean the Waste Collection Tray according to the instructions in Section 5.G. Failure to confirm disinfection and decontamination will result in decontamination charges before the instrument will be serviced. Select either (A) or (B): A. I confirm that the returned items have not been used with body fluids or contaminated by toxic, carcinogenic, radioactive or other hazardous materials. B. I confirm that the returned items have been decontaminated and can be handled without exposing personnel to health hazards. Circle the type of material used in the instrument: Chemical Biological Radioactive** Briefly describe the decontamination procedure performed: ____________________________________ ____________________________________________________________________________ ____________________________________________________________________________ ____________________________________________________________________________ Date: ____________________________________ Place: ____________________________________ Signature: _________________________________ Name (block capital letters): ________________________________________________________ ** The signature of a Radiation Safety Officer is also required if the instrument was used with radioactive materials. This instrument is certified by the undersigned to be free of radioactive contamination. Date: ____________________________________ Place: ____________________________________ Signature: _________________________________ Name (block capital letters): ________________________________________________________ Promega Corporation · 2800 Woods Hollow Road · Madison, WI 53711-5399 USA · Toll Free in USA 800-356-9526 · 608-274-4330 · Fax 608-277-2516 109 www.promega.com TM470 · Revised 2/20 7.E. Related Products GloMax® Navigator System Accessories Product Size Cat.# Dual Injectors and Pump Station Upgrade for GloMax® Navigator 1 each SA1304 GloMax® Luminometer Light Plate 1 each E6531 Replacement Tubing Assembly for GloMax® Navigator (Set of 2) 1 each GM2030 Bar Code Reader 1 each AS3200 USB Ethernet Adaptor 1 each AS8403 GloMax® Navigator System Service Options Product Size Cat.# GloMax® Navigator Standard Service Agreement 1 each SA1301 GloMax® Navigator Parts Only Service Agreement 1 each SA1302 GloMax® Navigator Basic Service Agreement 1 each SA1303 GloMax® Navigator Preventive Maintenance 1 each SA1308 GloMax® Navigator Instrument Sales Rental, 1 month 1 each E5302 GloMax® Navigator Installation Qualification (IQ) 1 each SA1305 GloMax® Navigator Operational Qualification (OQ) 1 each SA1306 GloMax® Navigator Installation and Operational Qualification (IQ/OQ) 1 each SA1307 Cell Viability, Cytotoxicity and Cell Health Assays Product Size Cat.# CellTiter-Glo® Luminescent Cell Viability Assay* 10ml G7570 BacTiter-Glo™ Microbial Cell Viability Assay* 10ml G8230 Mitochondrial ToxGlo™ Assay* 10ml G8000 CytoTox-Glo™ Cytotoxicity Assay* 10ml G9290 LDH-Glo™ Cytotoxicity Assay* 10ml J2380 Water-Glo™ Complete Aqueous 1 each AM1001 *Additional Sizes Available. Apoptosis Assays Product Size Cat.# Caspase-Glo® 3/7 Assay* 10ml G8091 *Additional Sizes Available. 110 Promega Corporation · 2800 Woods Hollow Road · Madison, WI 53711-5399 USA · Toll Free in USA 800-356-9526 · 608-274-4330 · Fax 608-277-2516 TM470 · Revised 2/20 www.promega.com Reporter Assays Product Size Cat.# Dual-Glo® Luciferase Assay System* 10ml E2920 Dual-Luciferase® Luciferase Reporter Assay System* 100 assays E1910 Luciferase Assay System* 100 assays E1500 NanoBiT™ PPI MCS Starter System 1 each N2014 NanoBiT™ PPI Flexi® Starter System 1 each N2015 Nano-Glo® Live Cell Assay System* 100 assays N2011 Nano-Glo® Luciferase Assay System* 100ml N1120 Nano-Glo® Dual-Luciferase® Reporter Assay System* 100ml N1620 ONE-Glo™ Luciferase Assay System* 10ml E6110 Bright-Glo™ Luciferase Assay System* 10ml E2610 Steady-Glo® Luciferase Assay System* 10ml E2510 Renilla Luciferase Assay System* 100 assays E2810 Renilla-Glo® Luciferase Assay System* 10ml E2710 ADCC Reporter Bioassay, Core Kit 1 each G7010 ADCC Reporter Bioassay, Core Kit 5X 1 each G7018 ONE-Glo™ + Tox Luciferase Reporter and Cell Viability Assay* 1 plate E7110 *Additional Sizes Available Cell Signaling Assays Product Size Cat.# P450-Glo™ CYP1A2 Screening System 1,000 assays V9770 P450-Glo™ CYP2C9 Screening System 1,000 assays V9790 P450-Glo™ CYP3A4 Screening System 1,000 assays V9800 P450-Glo™ CYP2C19 Screening System 1,000 assays V9880 P450-Glo™ CYP2D6 Screening System 1,000 assays V9890 ADP-Glo™ Kinase Assay* 1,000 assays V9101 Kinase-Glo® Luminescent Kinase Assay* 10ml V6711 Kinase-Glo® Max Luminescent Kinase Assay* 10ml V6071 Kinase-Glo® Plus Luminescent Kinase Assay* 10ml V3771 cAMP-Glo™ Assay* 300 assays (384-well plate) V1501 GloSensor™ cAMP Reagent* 25mg E1290 *Additional Sizes Available. Promega Corporation · 2800 Woods Hollow Road · Madison, WI 53711-5399 USA · Toll Free in USA 800-356-9526 · 608-274-4330 · Fax 608-277-2516 111 www.promega.com TM470 · Revised 2/20 7.F. Summary of Changes The following changes were made to the 2/20 revision of this document: 1. Changes to include software updates. (a)Patent Pending. © 2016–2020 Promega Corporation. All Rights Reserved. Caspase-Glo, CellTiter-Glo, Dual-Glo, Dual-Luciferase, GloMax, Kinase-Glo, NanoBiT, Nano-Glo, Renilla-Glo and Steady-Glo are registered trademarks of Promega Corporation. ADP-Glo, BacTiter-Glo, Bright-Glo, cAMP-Glo, CytoTox-Glo, GloSensor, Mitochondrial ToxGlo, ONE-Glo, P450-Glo and Water-Glo are trademarks of Promega Corporation. Excel and Windows are registered trademarks of Microsoft Corporation. Kimwipes is a registered trademark of Kimberly-Clark Corporation. Parafilm is a registered trademark of American National Can Company. Products may be covered by pending or issued patents or may have certain limitations. Please visit our Web site for more information. All prices and specifications are subject to change without notice. Product claims are subject to change. Please contact Promega Technical Services or access the Promega online catalog for the most up-to-date information on Promega products.